Warhammer Fantasy Battles 6th Edition: Empire vs Brettonia
Welcome back to the bloggy for a new battle report! This time, I had the pleasure of playing Warhammer Fantasy Battles 6th Edition, a classic, and my favorite, edition of the game which survives in our hearts and memories.


1 x Captain Klaus (general)
-Full Plate Armor, Shield, Sword of Might, Warhorse with Barding


I can still remember distinctly the first time I picked up the 6th edition "big rule book." I had just returned from staying with my grandmother in Florida during the summer of 2000. The new (and sealed) book was waiting for me back home, but I begged my parents to bring it with them when they picked me up from the airport so I didn't need to wait another excruciating 30-45 minutes without it.
All summer I had pored over my glorious Warhammer Armies: Skaven supplement, imagining the incredible horde of chittering ratmen I would loose upon the denizens of the Old World. However, little of the supplement made much practical sense, as I had never read the actual rules of the game. Frustratingly, my entire understanding revolved around what my thirteen year old mind could glean from the outdated 5th edition supplement.
But, no longer! With trembling hands I tore off the shrink wrap and began my dive into the world of Warhammer for true.
Twenty two years later, it's now time to play Warhammer Fantasy Battles again. The last edition I remember playing was the notoriously imbalanced 7th, so it's been roughly twelve to sixteen years since I last played any edition of the game.
Fittingly, my opponent will be my long time friend and the man I began playing with back before the release of Ravening Hordes, Mike.
Mike will be using his first army, the noble Brettonia, for our battle. I sadly no longer possess my original 5th edition Skaven army (soon to be rectified!), so I will be using my 6th edition Empire army. Since the long gone days of Middle and High School, our armies have grown and changed much, but some of the original miniatures and even paint jobs persist.
Rather than dive into the deep end, we chose to start with a 1000 point warm up game. We knew there would be a lot of rules that needed to be looked up, so we didn't want to get overwhelmed on our first foray. Of course, both of us re-read the original 6th edition rule book in preparation, but I've found rules fluency and preparedness for edge case situations arise from constant play, not from book learning.
Below are some *glamor* shots of my force I took the eve of the battle.


My list was:
1 x Captain Klaus (general)
-Full Plate Armor, Shield, Sword of Might, Warhorse with Barding
8 x Knights of the White Wolf
-Full command
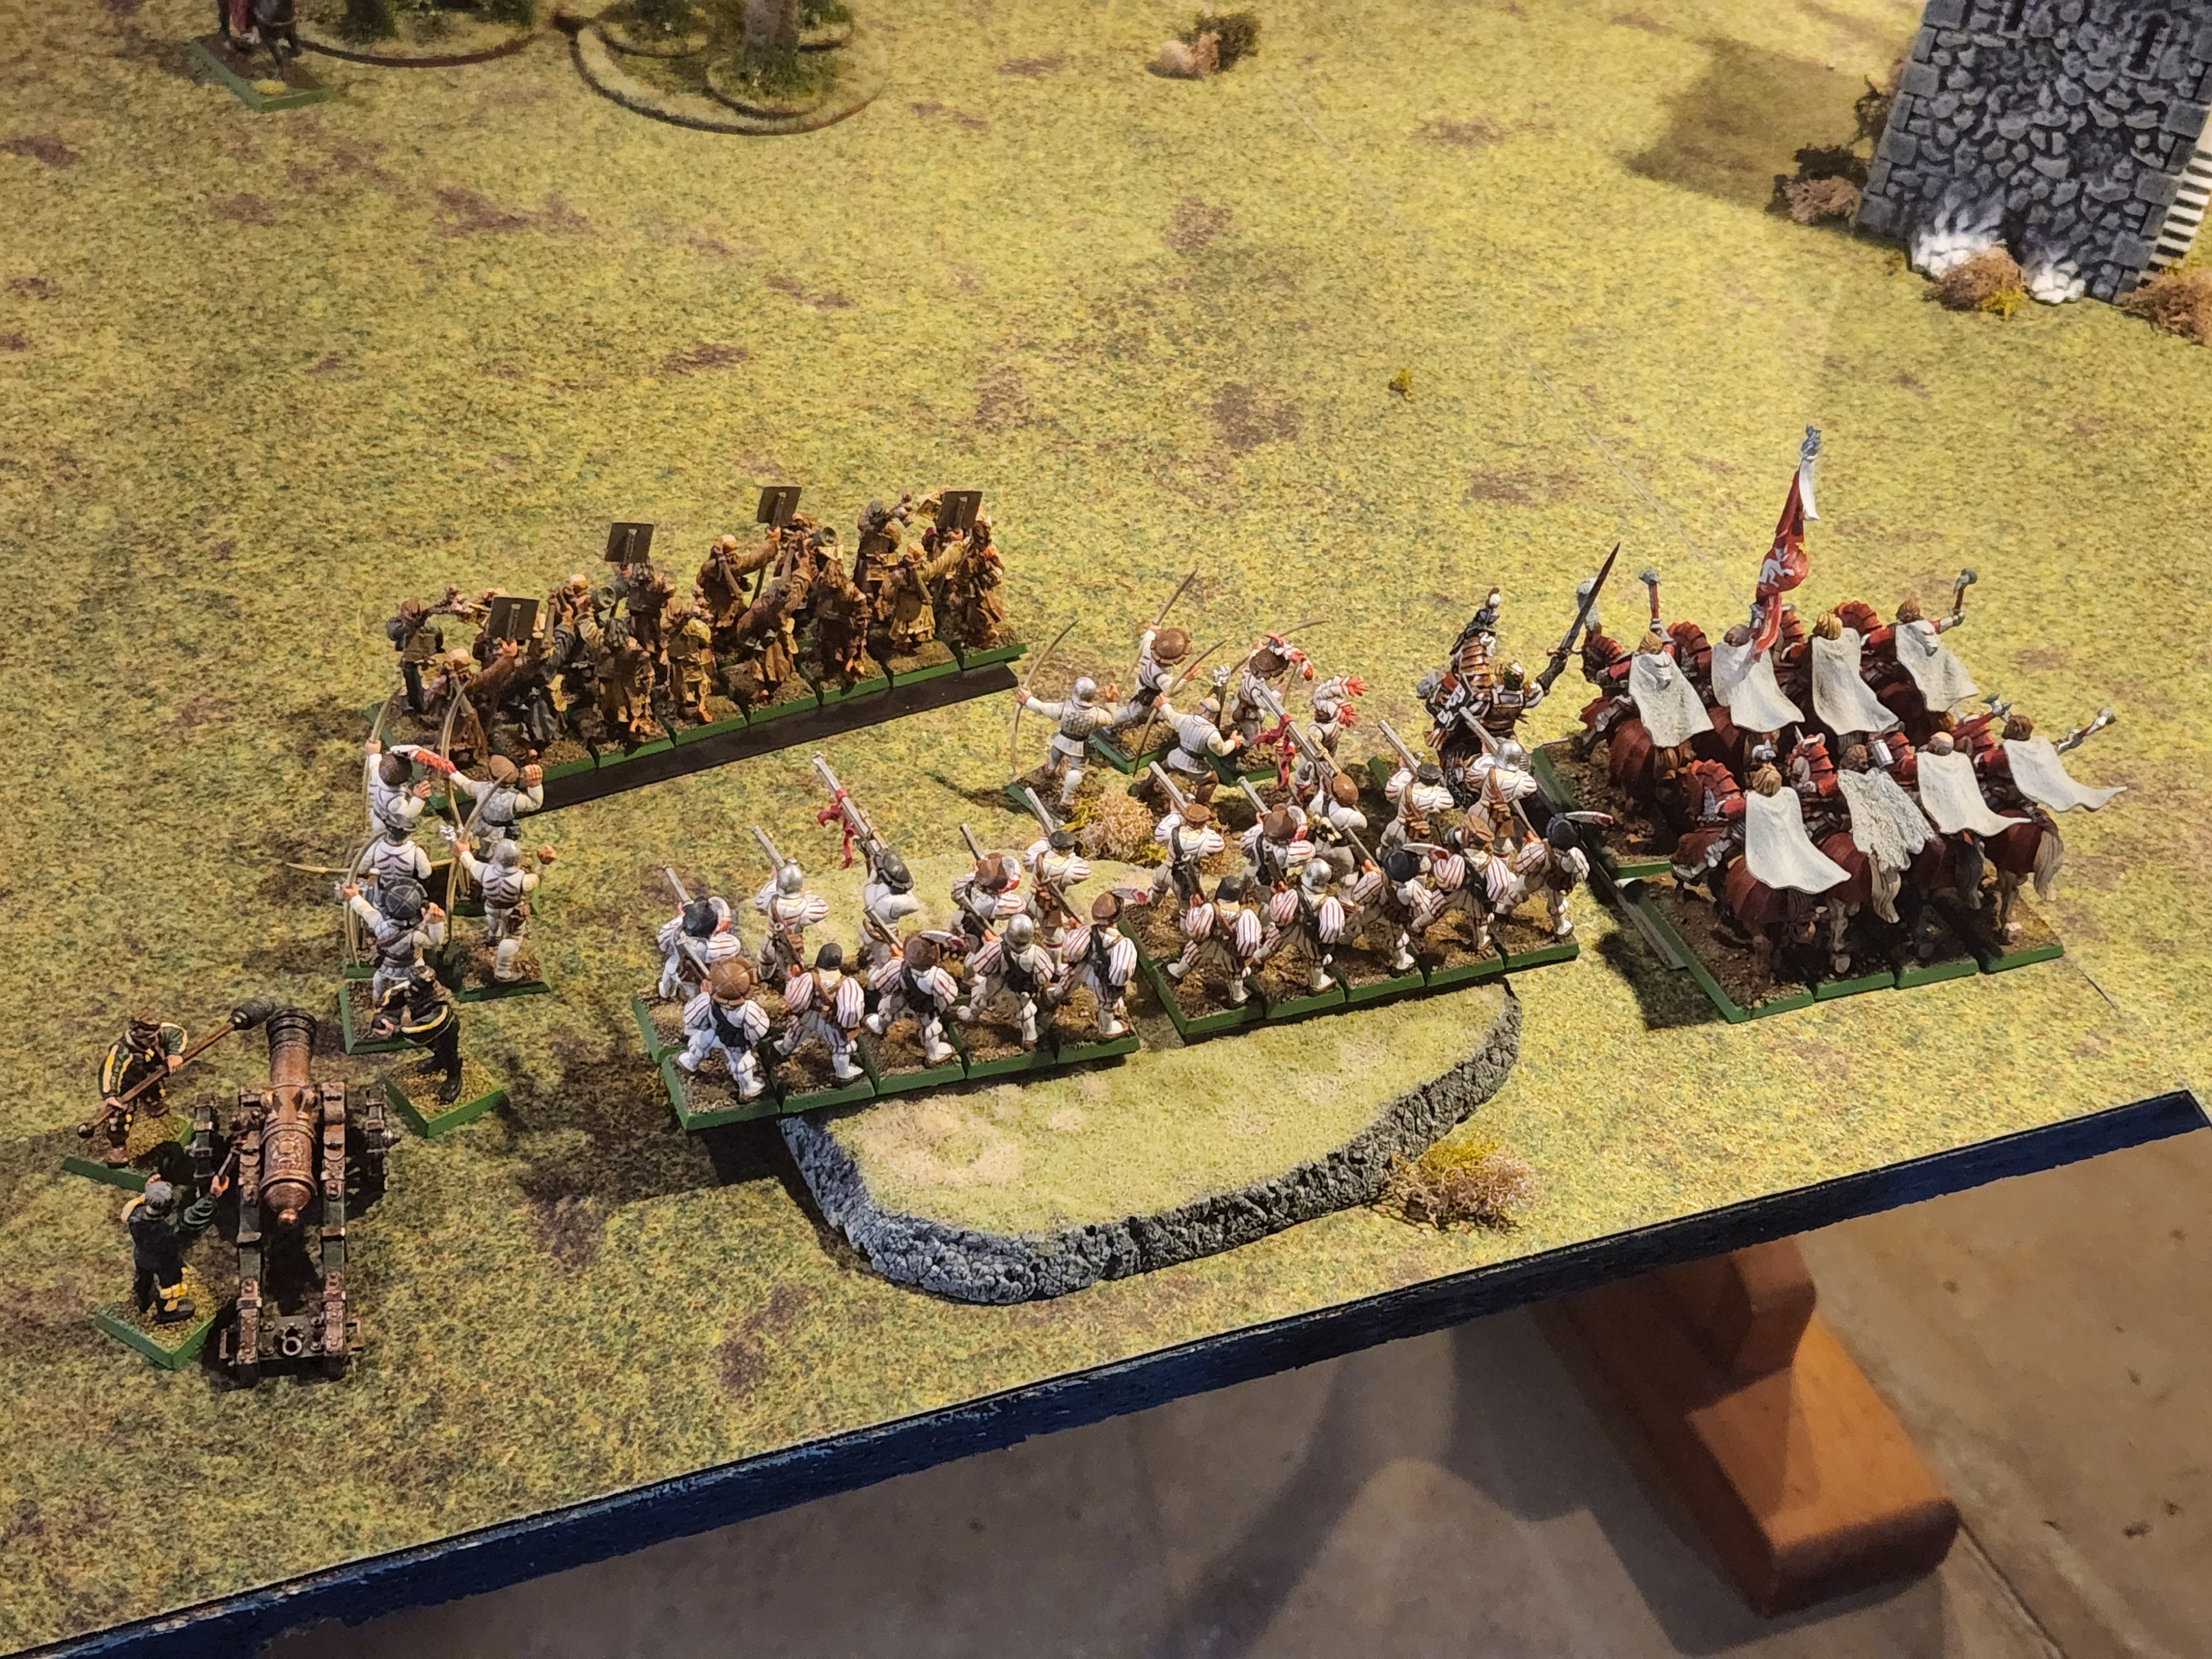
9 x Handgunners
-Marksman with Hochland Long Rifle
-5 x Archers Detachment
9 x Handgunners
-Marksman with Hochland Long Rifle
-5 x Archers Detachment
1 x Great Cannon
5 x Pistoliers
16 x Flagellants
I also nabbed a photo of Mike's flamboyant Brettonian's after our battle. They're a wonderful nostalgic trip to the 2000s, especially since I helped paint some of them myself!

His list contained:
1 x Paladin Michel (general)
-Gromril Great Helm, Heavy Armor, Lance, Shield, Barded Warhorse
1 x Paladin Gaston (battle standard bearer)
-Banner of Battle, Heavy Armor, Shield, Barded Warhorse
1 x Damsel of the Lady (level 1)
-Lore of Beasts, Adlos The Eagle's Cry
-Barded Warhorse
6 x Knights of the Realm
-Gallant
-Musician
7 x Knights of the Realm
-Gallant
-Standard
-Musician
8 x Knights of the Realm
-Gallant
-Standard
-Musician
5 x Mounted Yeomen
-Spear
-Bow
-Shield
Once our lists were assembled (in secret, of course) we rolled on the scenario table and received a 5, Capture! For this scenario, we would need to seize control of a central objective. Whoever had the closest unit to the objective at the end of the game (randomly determined after four turns) would win. In the case of two units (one controlled by each player) being equidistant from the objective, if one unit is worth more than double the number of the points than the other, the player controlling that unit wins. If not, then it's a draw!
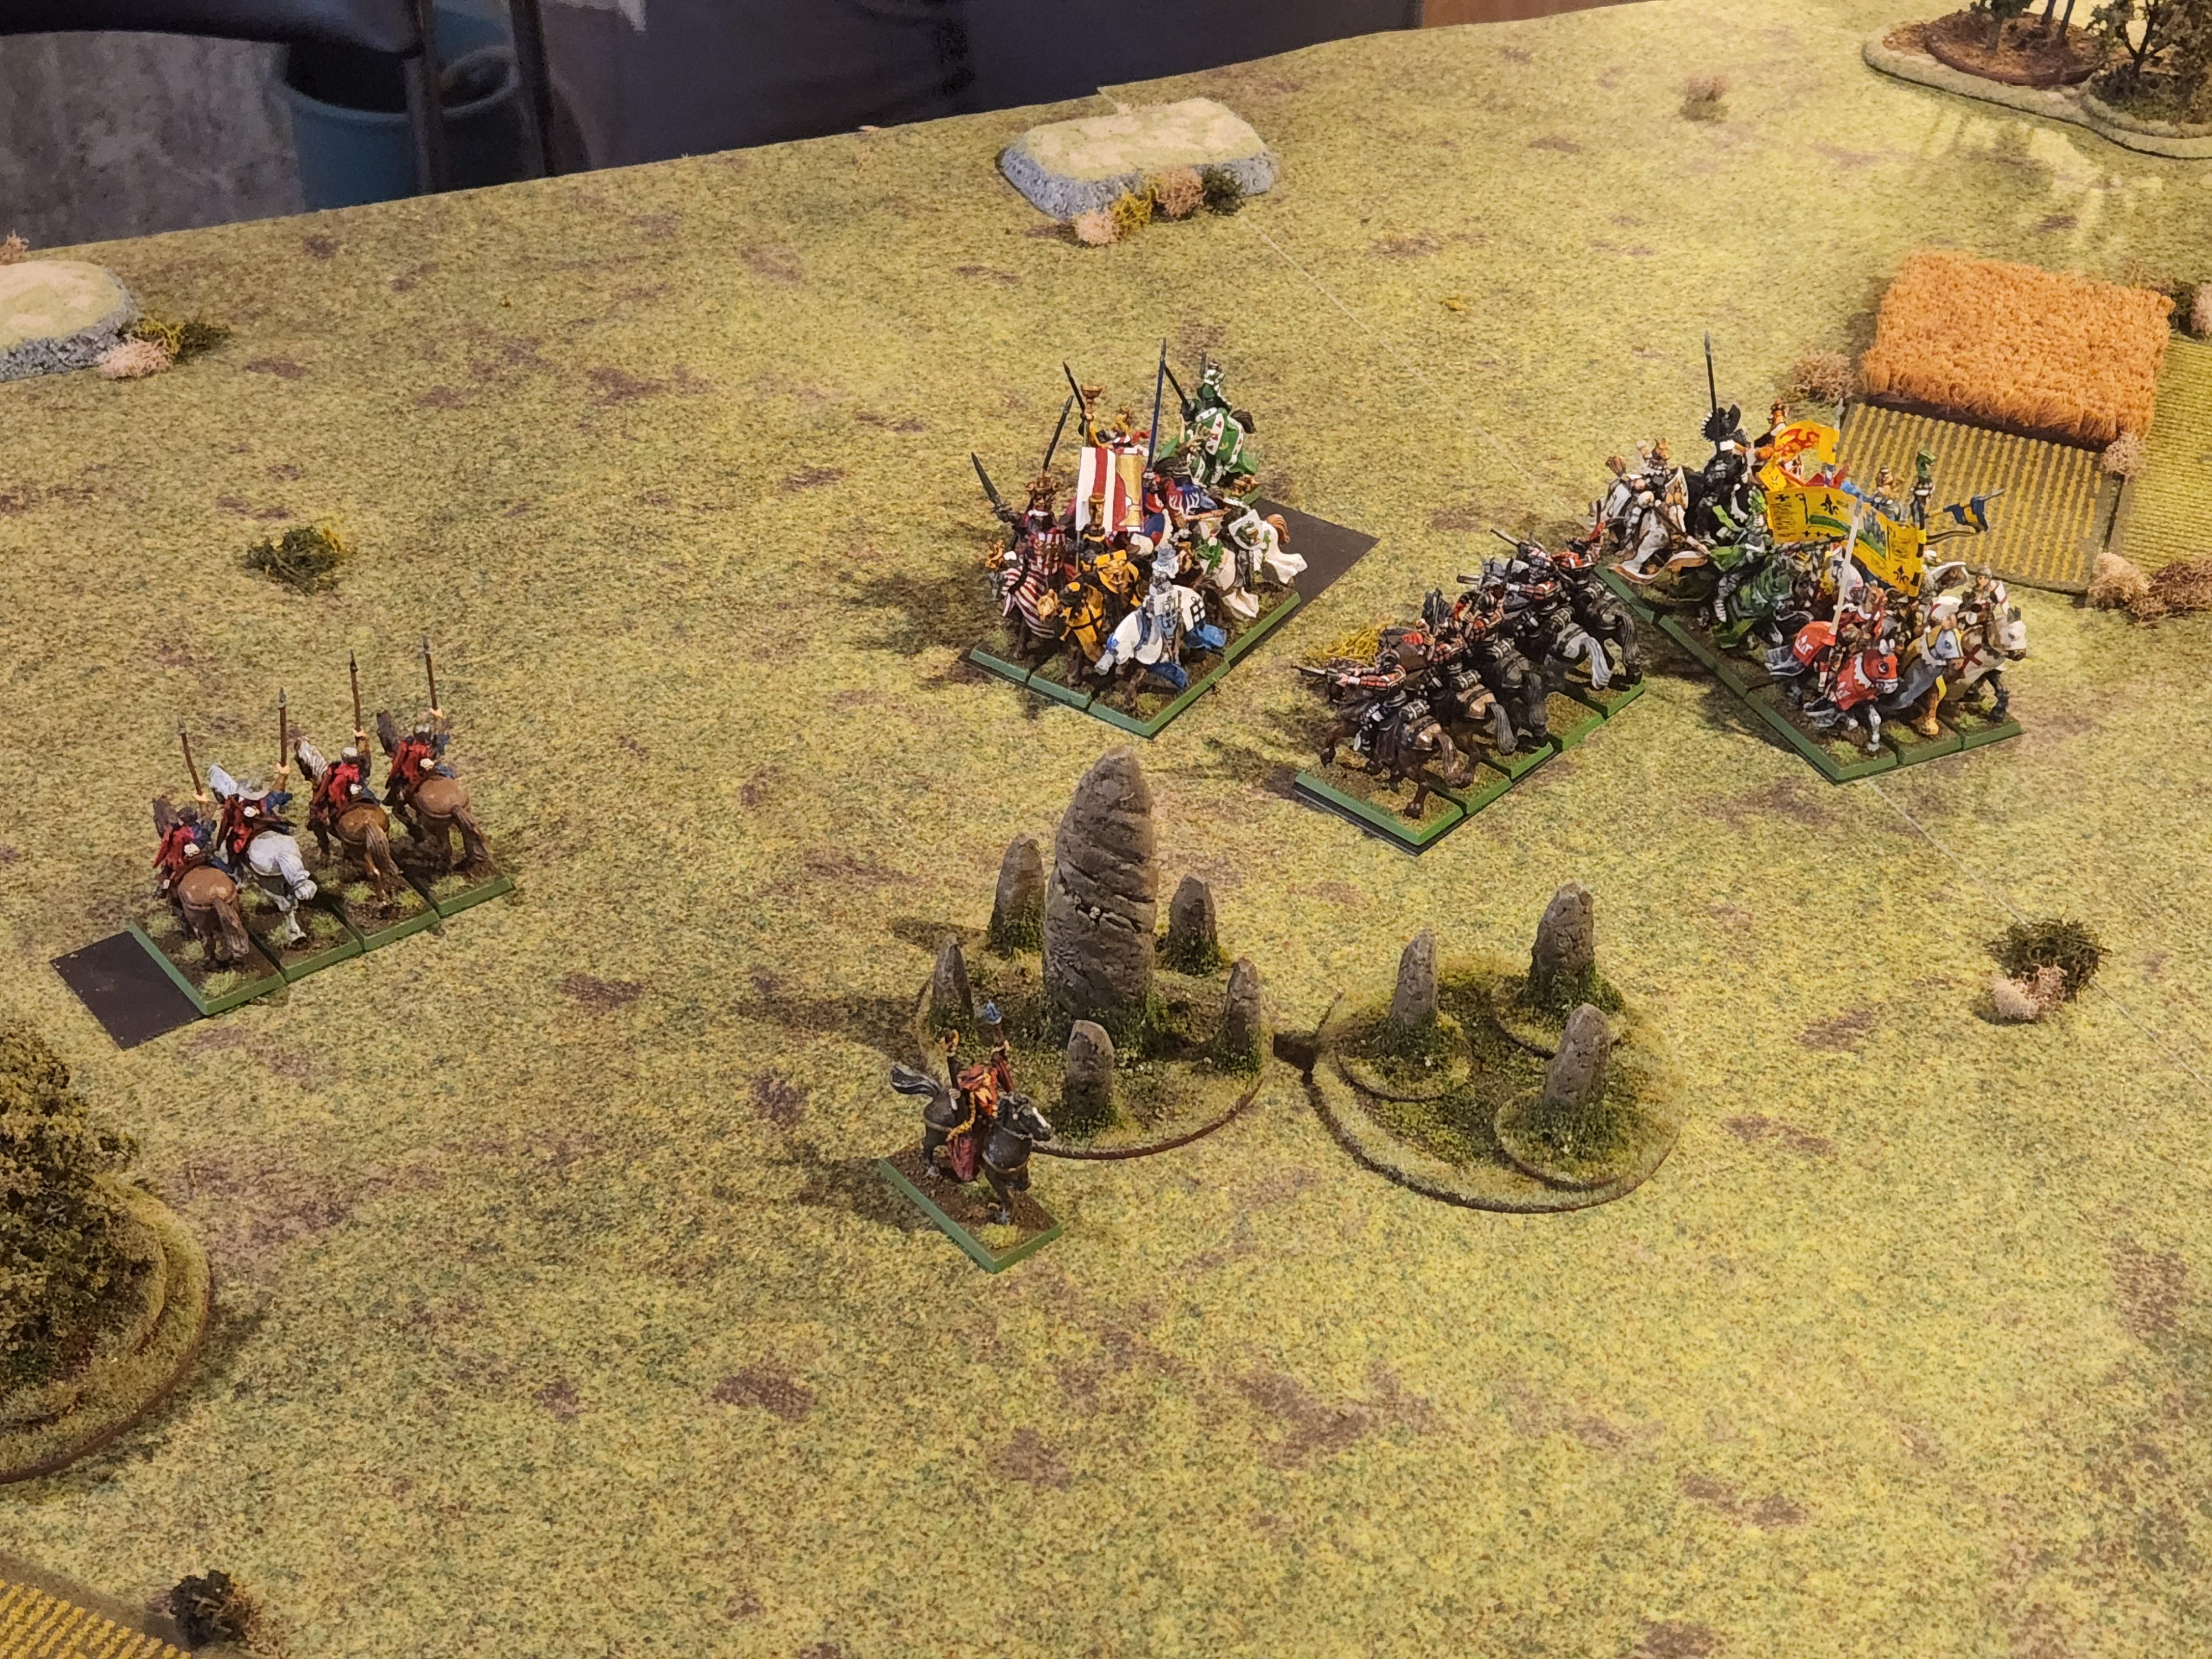
We set up the table using method 1, where I set up the terrain and my opponent chose the his preferred side. This set up method forces the one setting up to not favor either side too much, otherwise they'll be giving the one choosing the advantage. I'll need to start making some appropriately scaled terrain, as I'm mostly relying on my 15mm scale collection currently (notice the tiny hills and tree stand bases).

 |
| The fully set up play space. |
We then rolled for who began deployment first- I honestly can't remember who won the roll off, but it didn't matter too much. The Brettonian force had far fewer units to place than me, so they would be getting the +1 to the roll deciding who took first turn.
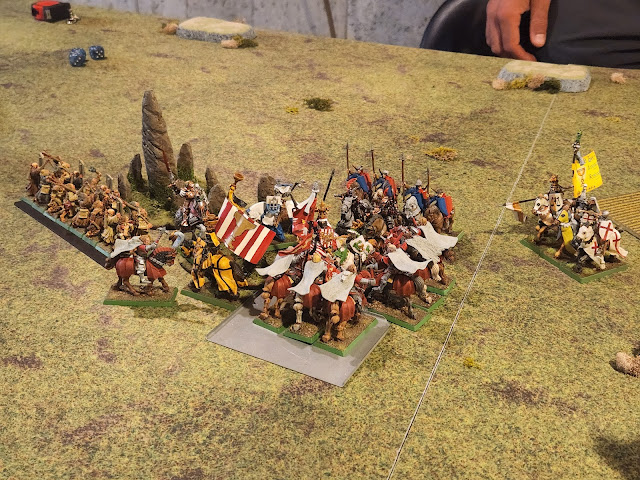
Here are our deployed forces. Mike chose the side with two hills, leaving me the side with the one.
 |
| The Imperial Point of View |
 |
| The Brettonian Point of View |
As they are wont to do, the Brettonians prayed before the battle, ceding the first turn to me.
Turn 1
Empire
For my first turn, I took the initiative and marched my pistoliers right up into the maw of the Brettonian line. The goal here was to give myself enough room to flee when charged, but to be within 8" of both Brettonian lance formations, causing them to be march blocked. March blocking was my best hope for slowing the Brettonian advance and buy myself time to thin their ranks with my Schwarzpulver.
Normally, marching units cannot shoot, but pistoliers are fast cavalry and can thus fire even when marching. Likewise, as fast cavalry, they can fire in a 360° circle. Furthermore, as they carry pistols, they do not suffer from normal to hit penalties from movement.
In this shooting phase, my cannon, a guess range weapon, needed to fire first. I targeted the leftmost lance and fortunately was able to strike two of them with a cannonball! Unfortunately, the Lady was feeling benevolent and protected her faithful knights with her foul ward save.
Next up, my pistoliers were able to take out a single knight from the big bad lance (in which were both the general and battle standard bearer). I wanted to thin this unit quickly, hopefully causing them to take a panic test.
Lastly, my handgunners both fired upon the leftmost lance, as it was the only non-march blocked unit of knights. Sigmar was with me, and my handguns both rolled 6s for the extra range benefit they receive the first time they fire. Given the additional benefit of their places on the hill, all eighteen handgunners and both marksmen were within firing range. To my great pleasure, and Mike's horror, three noble sons of Brettonia met their doom and tumbled from their finely bred warhorses. This triggered a panic test, as 25% of the unit had been felled in a single round of shooting. Fortunately, Brettonian knights are built of sturdy stuff, and managed to keep their wits about them.


Brettonia
To open his turn, Mike declared a charge with his rightmost lance against my march blocking pistoliers who, of course, elected to flee. I rolled quite high on my flee distance, safely putting them out of harm's way and causing the knights to fail their charge and move their compulsory 8 inches.
The big bad lance wheeled and moved towards the central objective.
The leftmost lance marched forward, partially screened (and blocked) by the mounted yeomen.
In his magic phase, he attempted to cast The Eagle's cry, but rolled a miscast. Fortunately, he then rolled a 7 and was spared further attention from demonic entities.
In his magic phase, he attempted to cast The Eagle's cry, but rolled a miscast. Fortunately, he then rolled a 7 and was spared further attention from demonic entities.
In his shooting phase, the yeoman were unable to damage the Imperial forces.


Turn 2
Empire
First things first, I attempted to rally my pistoliers and, fortunately, succeeded. As part of their rally, they were able to reform for free and about face. Another advantage of fast cavalry is that they, unlike other units, can move normally after rallying, if they fled in response to a charge. To resume my march blocking tricks, I marched my pistoliers right up into the the thick of it, between the two knight blocks but outside both of their front vision arcs.
My flagellants advanced slightly and my archers darted back and to the right. I wasn't sure how things were going to move forward, so I wanted to position them in order to reroute possible chargers going after my gun line or knights.
In my shooting phase, the cannon again struck home and fired into a block of knights. Once again, the she-devil "Lady" protected her villainous knights, thwarting my cannonball with an accursed ward save.
On the other hand, my pistols and handguns again performed admirably - a sure sign of the superiority of Reiklander engineering.
The pistoliers managed to wound another knight, reducing the big bad lance even further in strength.
The handgunners completely wiped out the leftmost unit of knights, save their gore spattered damsel. Lastly, one marksman truly proved his rank, popping the head of a single yeoman. The damsel, possibly due to shock, managed to avoid panicking as her escorts rapidly disappeared around her. The yeoman, most likely due to their lowly births, fled once they saw the knights felled behind them.


Brettonia
A bit dismayed by the loss of a lance and continuous march blocking, Mike needed to make some decisions about how to continue. Should he continue advancing, hoping to charge and break my force, or play more conservatively, backing up and making a play for the objective? Either way, two timers were ticking: one, being the random turn counter, the second, being the grind of my oppressive ranged weaponry.
As a true man of Brettonian values, Mike pursued honor, boldly rushing forward to find glory at the point of a lance!
Unfortunately, I seem to have failed to take pictures of this turn, but I do recall what occurred.
Mike was unable to rally his yeomen, so they continued their flight. Both of his remaining lances moved towards my lines, though hampered by the march blocking of my pistoliers.
The big bad lance turned and directly faced my pistoliers, forcing them to relocate or face certain death.
Mike is a seasoned Brettonian player, so his ability to judge 16" on the tabletop is second to none. He masterfully advanced his knights to what came out to approximately 15.5" away from my knights, just within his charge range and outside of mine!
His damsel came around the objective and successfully managed to cast The Eagle's Cry on my pistoliers. Fortunately, they did pass their leadership test, but now could only move 7 inches, rather than their full 8.
Turn 3
Empire
To begin, my knights shuffled backwards, just outside of his charge range. After all, I need to buy time for my guns to do their work. Furthermore, who wants to get charged by a lance of Brettonia's best?
My flagellants and general advanced on the left flank, moving in towards the objective.
My archers, now actively avoiding the knights, eagerly shuffled away from the right flank.
While hobbled, my pistoliers remained mobile and made the best of their situation. They continued haranguing the knights, staying outside of their charge arcs and peppering them with pistol fire.
My archers failed to wound anything, as is their lot in life.
My cannon was again thwarted by the bog witch of Brettonia, a thousand curses upon her and her magical meddling!
Per usual, the handgunners punched above their weight class, killing another two knights from the rightmost lance.


Brettonia
On his turn, Mike advanced his knights up further, fully aware a charge was coming. To reiterate, if he did not advance, he would eventually be gunned down, so committing to his plan was critical.
Mike also was able to rally his yeomen and ran them as quickly as possible to support his knights.
His damsel rode around the ruins near the objective and attempted to cast The Eagle's Cry on my knights. Fortunately for me, I was able to dispel his spell, since it passed with a 6 on three dice.
During his shooting phase, his yeomen loosed arrows on my pistoliers and managed to bring one down!


Turn 4
Empire
On my turn, my Knights of the White Wolf let out a feral howl and charged into the Brettonian knights.
My flagellants advanced on the objective, hopefully to seize it for the game.
My general turned and advanced on the coming knights, ready to throw his weight into the fray.
In the shooting phase, my archers failed to wound anything, per usual.
My cannon again failed to do any damage, this time rolling a 10 on the artillery dice and wildly overshooting their target.
In the ensuing combat, my knights fought valiantly, my First Knight even challenging the Brettonian Gallant to a duel. While I did lose a knight in the melee, the challenge was won. Ultimately, the melee ended up a draw, so the two units of rival knights remained stuck in embittered combat.


Brettonia
Unfortunately, Mike was unable to get his big bad lance unit into combat during his turn. The damsel blocked their charge lane to support their fellow knights, so they had no choice but to move farther forward.
The damsel turned and moved to the back ranks to better work her magic and prevent herself from blocking further charges.
The damsel turned and moved to the back ranks to better work her magic and prevent herself from blocking further charges.
The yeomen advanced further and managed to kill another two of my beloved pistoliers with their arrows.
In the second round of combat, my knights were able to bring down another Brettonian knight, ensuring a narrow victory. Even with the aid of their nearby battle standard bearer, the knights were broken and fled, losing the blessing of their horrible swamp demon patroness.
At the end of the turn, Mike rolled to see if there would be a fifth turn and, sure enough, there was!


Turn 5
Empire
Time for more charges!
On this turn I managed to pull off a dreaded triple charge - my Knights of the White Wolf, captain, and pistoliers all charged into the big bad lance, chock full of Brettonian paladins.
My flagellants, yet unmolested, walked up to and claimed the central objective.
My handgunners focused on thinning the number o remaining knights, hopefully preventing them from rallying. They picked off two more knights, but couldn't quite seal the deal and bring them down below 25% of their initial number.
On the other hand, they did fill the damsel with multiple rounds of lead ball, taking her out of the game.
The combat was strangely bloodless, despite the number of combatants. Captain Klaus offered a challenge and sir Michel accepted. Likewise, my First Knight offered a challenge and sir Gaston, his battle standard bearer, accepted. Despite the Sword of Might, the cavalry hammers, point blank pistols, Brettonian steel, and numerous sets of hooves and snapping horse teeth, only one knight of the realm was wounded. I did manage to win the combat, but with the help of the battle standard, his lance wasn't going anywhere! I did elect to lap around with my incomplete rear rank, hopefully to add more attacks into the fray next turn.


Brettonia
On Mike's turn, he was able to rally his unit of three knights, reforming them in readiness for a potential sixth turn.
He also charged his yeomen into the rear of my pistoliers, lending extra men to the melee.
Unfortunately for me, those yeoman spears were sharp and wiped out my remaining two pistoliers quickly. I traded the life of one knight for two Brettonians, but it wasn't enough- with his battle standard's war banner and the death of my pistoliers, Mike won the combat by two, forcing me to take a leadership test. My knights broke and fled, by their retreat was covered by my captain, who staunchly refused to turn tail!
At the end of his turn, Mike rolled to see if a sixth turn would follow, but the die decided otherwise, ending the game.


Summary
As my flagellants undisputedly were closest to the objective, the game was mine. Despite a powerful first few turns, the game ended precariously closer than I would have liked, seeing as a sixth turn could have led to some potential complications. Regardless, as they are unbreakable, nothing, save annihilation, could have moved that unit of flagellants from their position. Mike's most expensive unit, the remnants of the big bad block, only held a value of 233 points, insufficient to doubly outprice my 176 points of flagellants. Had the game continued, however, he may have been able to pull out a hard fought draw.
By far, the MVP unit for my army was the pistoliers. They're incessant march blocking crippled the Brettonian movement phase and bought me invaluable time to whittle down Mike's force. The handgunners also performed admirably, raining down a constant stream of withering fire.
My archers, on the other hand, were a pretty large failure. They didn't manage to deal a single wound all game. To be fair, they had primarily been brought to act as speed bumps for the knights, which ended up being unnecessary.
Meanwhile, my poor cannon. I was astounded by its lack of misfires - the crew performed well and hit their targets three out of the four times it fired. However, that damned ward save could not be beaten, rendering the thing useless. Next time, I think bringing another unit of pistoliers instead would be a much better use of points.
It was great finally getting to player 6th edition Warhammer Fantasy Battles again. Mike and I are already planning our next game, though I may be pitted against Dark Elves, rather than the colorful heraldry of Brettonia.
Thank you for reading my blog, stay tuned for more hobby updates and battle reports (hopefully) soon.
-Nick


Boy it felt good to play Warhammer Fantasy Battles 6th Edition again! It took me right back to your garage loft where we would suffer through the summer heat or bundle up in jackets and hats in the dead of winter while painting miniatures or playing out battles. Ever the Imperial tactician, your careful, premeditated maneuvering won you the day, but Bretonnian "honneur" remained intact. We will meet again soon on the field of battle.
ReplyDeleteOui! What's a Brettonian without his honor and an Imperial without his gun powder?!
DeleteGreat writeup. Very nostalgic for wfb lately. Hope to see more of your games reported on!
ReplyDeleteUs too! Mike and I are hardcore 6th players, so more to come.
Delete