Hobby Update: Sea Inlets and Chasms
Hello and welcome back to the blog!
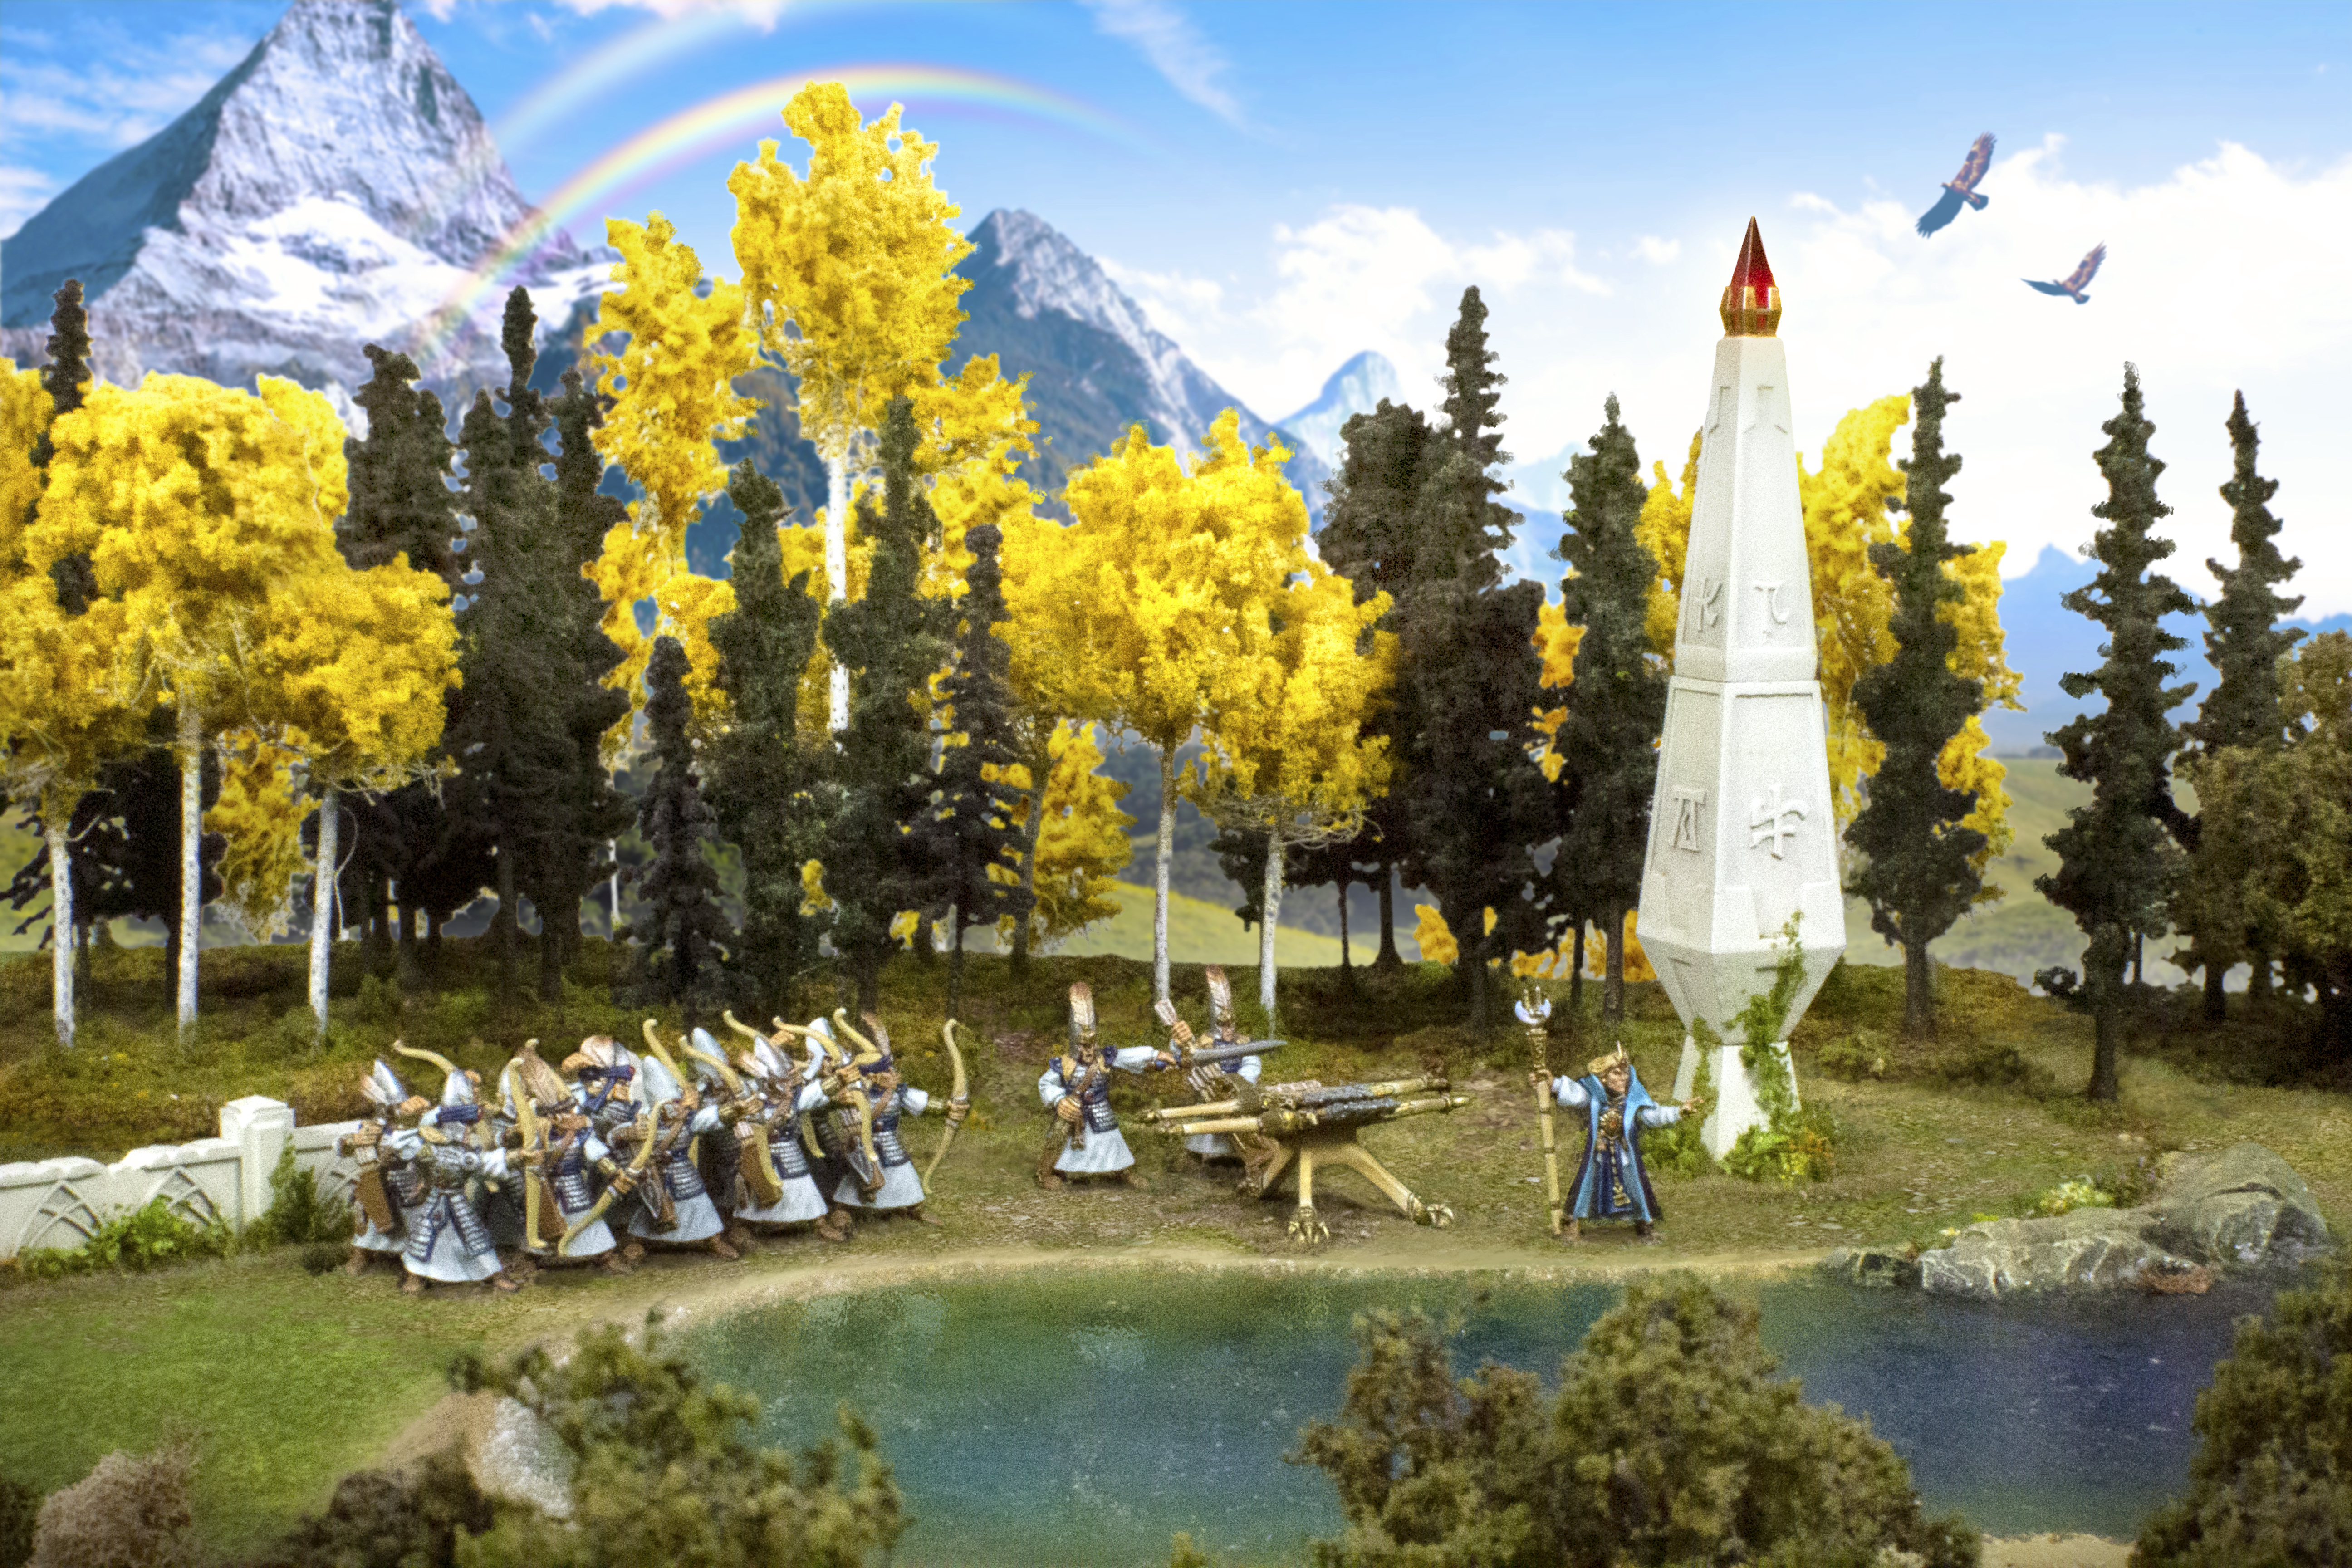
This entry will focus on two pieces of terrain I recently worked on, a chasm and a sea inlet.
These were both challenging pieces, though for very different reasons.
Step 1: Bases
To begin any terrain project (well, except for maybe hills), you'll need a good base to work on. I use around 3/16" MDF sheets which can be found at most large home improvement or hardware stores.
First step is to plan out the base sizes and shapes. I normally do this with a black magic marker to help guide my cuts and to make the most use of my materials.
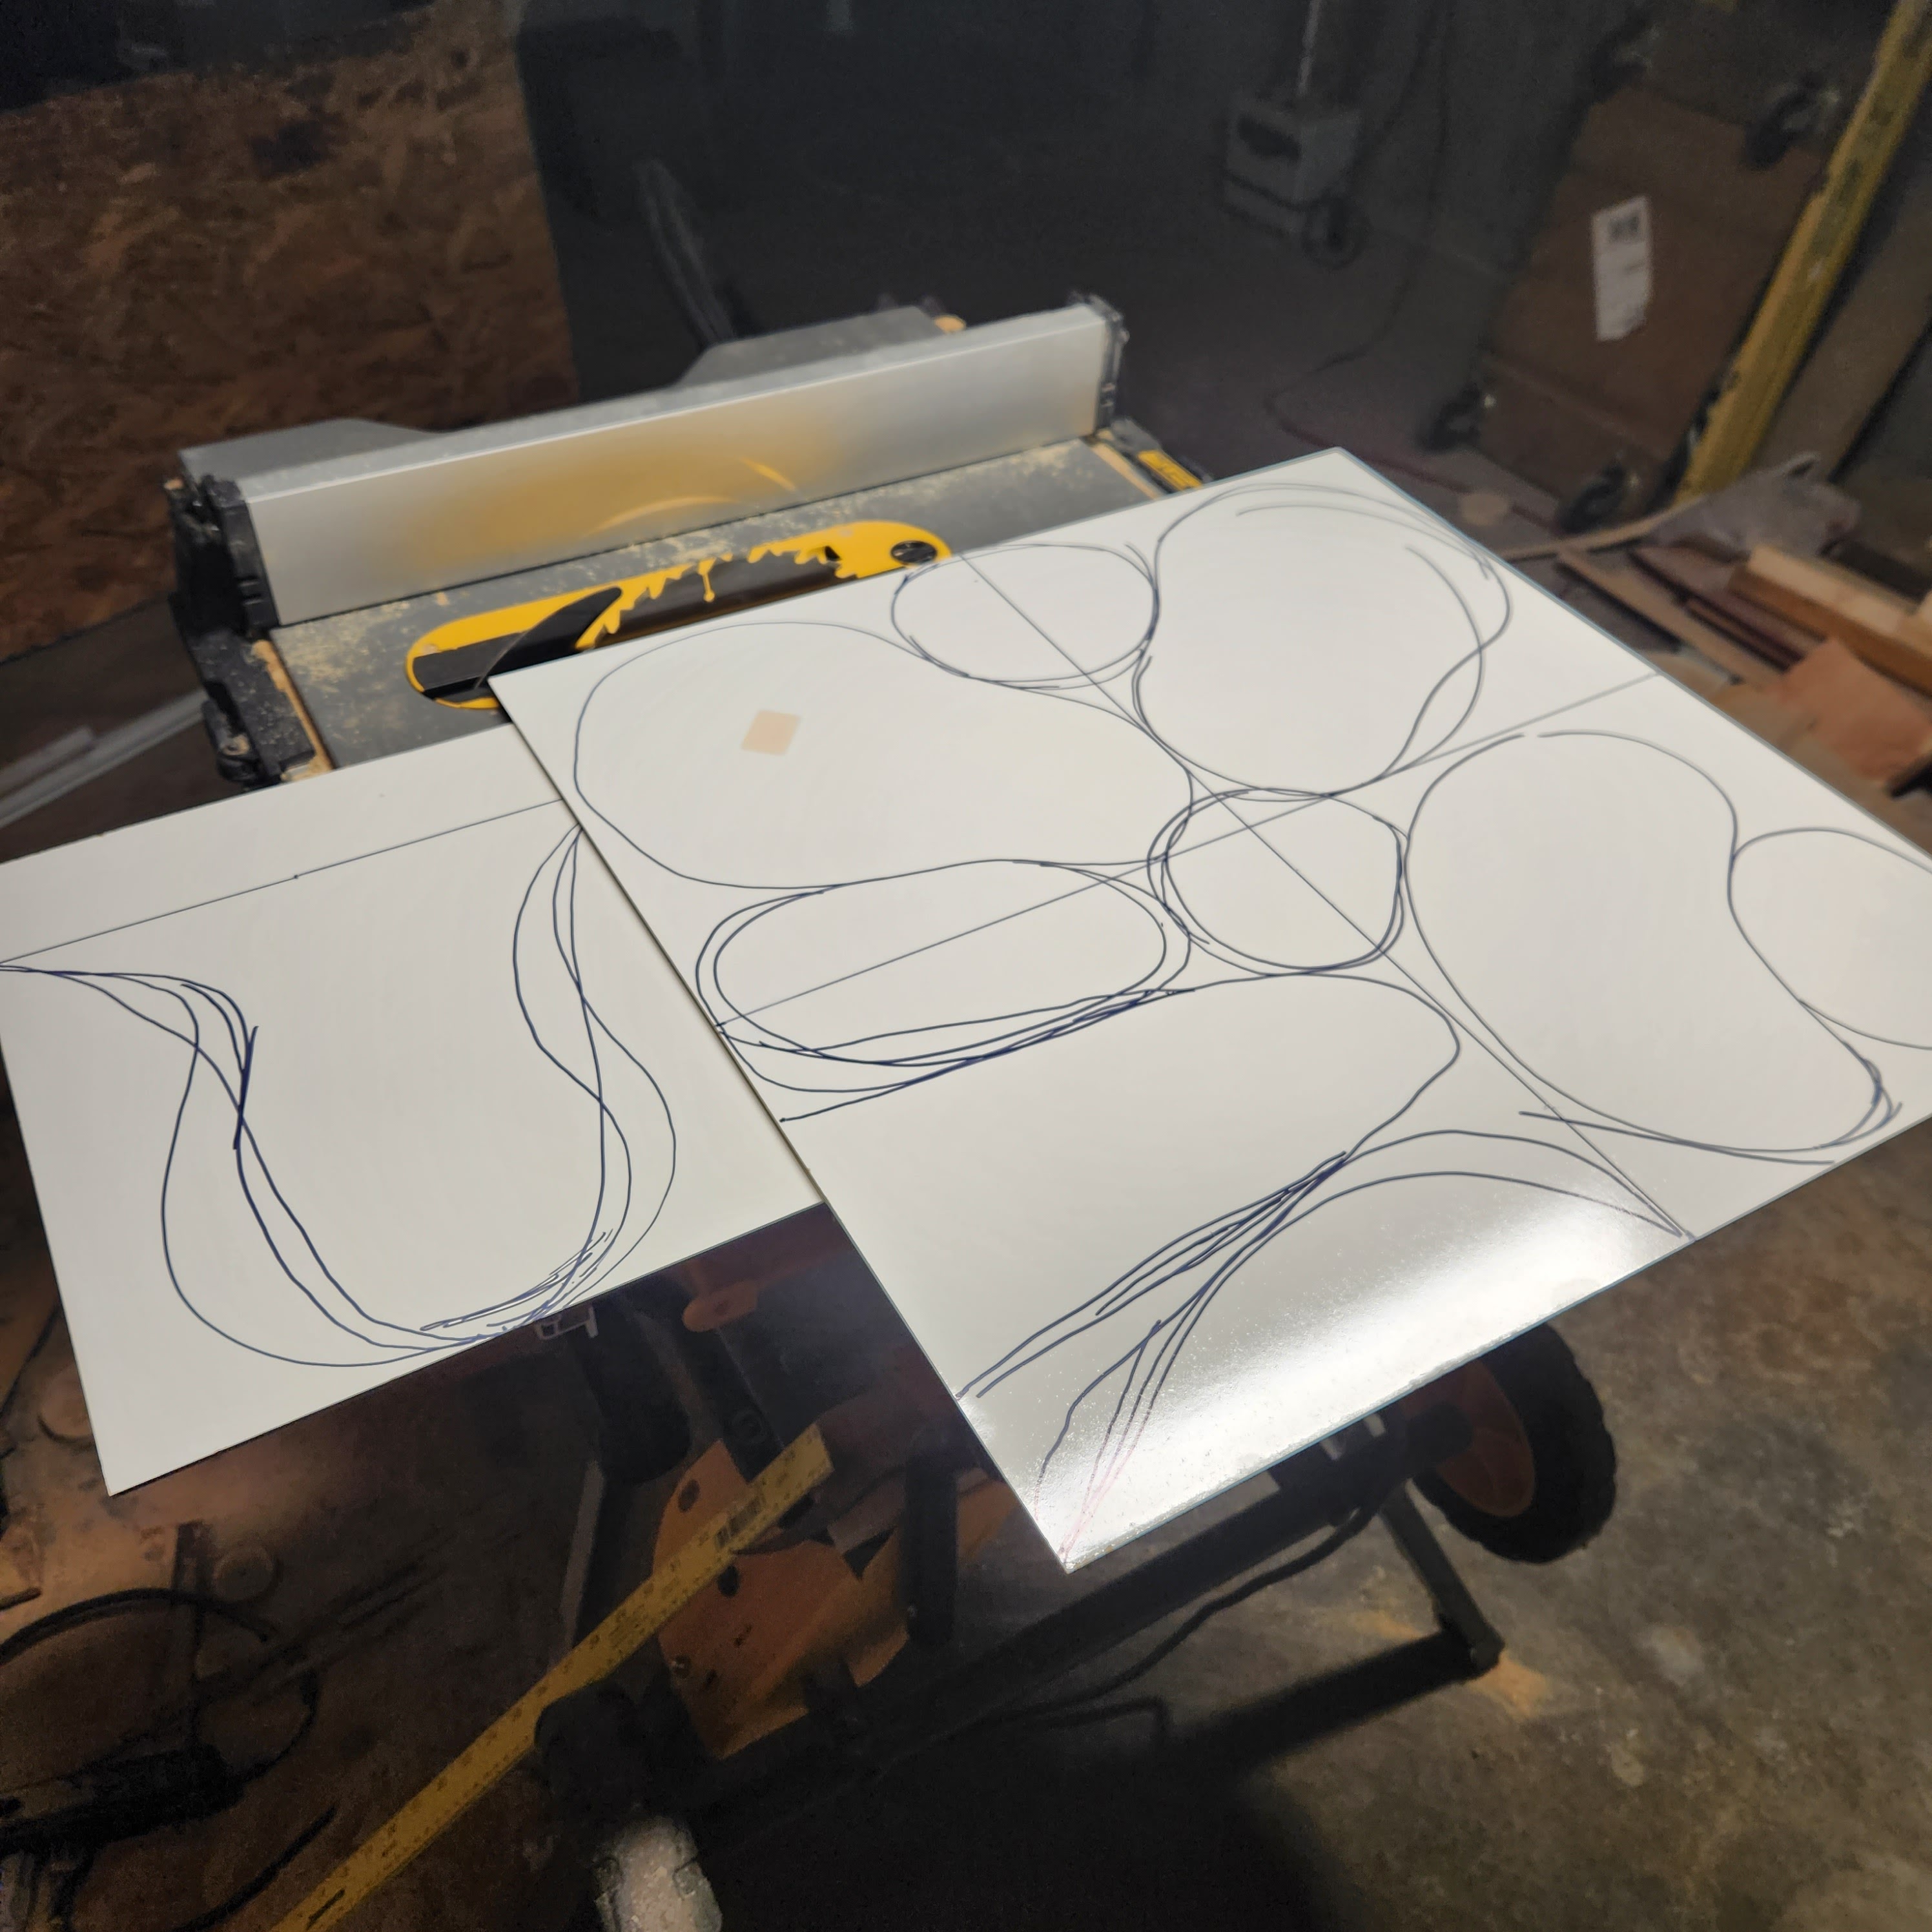
My second cuts are done with a handheld jigsaw. This is not my favorite tool, since it causes a lot of vibration in the MDF. Someday I'll upgrade to a stationary jigsaw, but today is not that day!

I find it really useful to sand the edges with a nice bevel on both the top and bottom corners, as well as the outer face. This helps remove any rough edges, as well as to smooth out hard corners which won't receive glue well.

I then prime the bases with my go-to gray Krylon primer, followed by some brown house paint matched to Vallejo Flat Brown 70.984. Before we go on, here's a note on paint.
Paint ain't cheap, especially specialist hobby paint like I use on my minis. With that in mind, paints which I use on terrain or in large quantities I normally take to the hardware store and get a quart made to match. To be clear, these aren't really a substitute for the paints I use on my minis, they are just more cost effective for painting large surfaces, like terrain bases or movement trays.
I transfer these to larger dropper bottles using a big syringe, since paint cans aren't exactly easy to use, and they're good to go!

Step 2: Buildup
Once the bases are painted up, it's time to start building up the terrain itself.
For the sea inlet, I started by creating a small dam with my hot glue gun. This helped me define the perimeter of the water feature, but also will hopefully prevent any resin leakage. I also added a few large rock pieces which I cast using plaster and molds from Woodland Scenics.
For the chasm, I roughly mapped out the jagged sides of the hole. I then took rough pieces of pink styrofoam and hot glued them down to the base.
Both terrain pieces were then worked up with layers of spackle and plastic wood using sculpting tools and brushes.


This stage took multiple coats and sanding to keep things nice and smooth.


Step 3: Painting
Once this was dry, it was airbrushing time. Getting a nice, even gradient would be key to creating the optical illusion of depth in my sea inlet, since I don't have a raised board with interchangeable sixths.
I started in the deep end, then faded my way up to the shore line. Rather than clear out my airbrush reservoir between colors, I used the lingering amounts remaining to help blend each color.

These were the colors I used for my water. Truth be told, I started with the blue and later added in some dark sea gray with a brush to simulate the rocks along the shore underwater. Otherwise, the progression was:
- Vallejo Blue
- Vallejo Dark Prussian Blue
- Vallejo Prussian Blue
- Citadel Sotek Green
- Citadel Temple Guard Blue
- Citadel Baharroth Blue
- Vallejo Sky Blue
- Vallejo Silver Gray


After airbrushing was complete, I added some fine ballast (a mistake) to create my sandy shores. I also tried to blend this into my normal sand mixture that I use for dirt but it turned out the fine ballast was actually more coarse than the sand mixture! Likewise, the ballast had created a very obvious edge to the water, something that just looked off.
To remedy this, I spent way, way too late of an evening using thinned spackle and a brush to "paint" in a more smooth transition. This helped blend the sand into the water, allowing for less of an obvious edge. I also took advantage of forced perspective by using different coarseness brushes to fade the surface details of the spackle from fairly grainy to completely smooth, simulating depth.
Once the spackle dried, I again painted the edges of the sand, blending it into the water and then drybrushing the bottom to add a little bit more texture.
I don't have pictures for the next step, but pretty much there was a lot of drybrushing. Any dirt area was drybrushed up with Vallejo Cork Brown, followed by Vallejo Green Gray. You guessed it, these were matched latex home paints, not straight from the dropper bottles. The beaches were painted mostly with Vallejo Ivory drybrushed with cheapo FolkArt White.
The rocks were a bit more time consuming- I used a variety of craft paints, as well as some Vallejo paints to simulate lichen. These were also drybrushed with Cork Brown and Green Gray to help blend them into the shore.
Once the paint was applied, the sandy areas and rocks received a little weathering powder to make them feel more sandy.

With everything repainted, it was time to pour resin!
Step 4: Resin
I used Envirotex Pour On resin mixed with a little bit of blue, green, and brown dye (also from Envirotex). When using dyes, less is more, so it's always best to try a few drops at first when finding your desired color.


When mixing resin, follow the directions. Use 1:1 ratios of resin to hardener and mix slowly, but thoroughly. Mixing too quickly can cause bubble formation, which we don't want (unless you do, but that's your call). Make sure to scrape the sides of the mixing container thoroughly to get everything to mix, otherwise you might accidentally pour resin which will not cure.
When pouring resin, make sure to do so in a trickle, not a dollop. The thinner your stream, the fewer bubbles can travel down it. Try to pour evenly across the entire surface, otherwise it can be very difficult to determine if you've poured enough or too much.
One key thing to do when pouring an open faced area, rather than an enclosed area, like a pond, swamp, or lake, is that the resin isn't going to neatly stop itself at your terrain's base. To make sure you don't accidentally resurface your floors, it's best to create a resin dam. I made my dam out of clear plastic card and hot glue. I sincerely thought I had overdone it, but somehow the resin found its way out regardless. I ended up needing to use copious amounts of hot glue to stop the leak, as well as a paint stirrer for extra strength.
You'll also notice some kelp and sea weed around the rocks. These were added primarily before the resin pour, as I wanted them to appear underwater. I created these using Silflor foliage soaked in gloss Mod Podge and affixed to the bottom of the inlet.


Despite the horror of my leaking resin, everything turned out alright. I did have some bubbles, but nothing that a little blow torch couldn't handle. If you run into small surface bubbles yourself, try (very carefully) using a lighter or blow torch to remove them; I was actually shocked how well it worked.


Step 5: Waves
However, the result of a perfect pour is a completely smooth, flat surface...not very realistic for an inlet of the sea. To remedy the issue, I started by using Liquitex Acrylic Gel Medium to add some surface noise and waves. I used it straight out of the bottle with a crappy brush and tried to figure out the rough direction the waves might travel.


In the end, however, I felt that the waves along the shore needed a bit more white and gave them a quick, and very light, drybrush of white paint. In the future, I'd like to try some really choppy or large wave water, but for tabletop gaming purposes they're not truly ideal.
Step 6: Finish Touches
No terrain is complete without a few finishing touches!
For my chasm, this mainly meant some foliage and heavy matte varnish applications to the the black part of the terrain. I also used some matte black to help blend the edge of the chasm wall with the floor, giving the illusion of depth as light faded away. Making sure a heavy matte varnish was used would be critical, since any reflectivity on the black would completely destroy the effect. As you can see in the pre-matte phase photo below, the black portion had a faint sheen to it which was not conducive to my desired appearance.


- Using watered down modge podge (roughly 1:1), I applied a faint coating of Woodland Scenics Light Green Coarse Turf to the ground. I really no need to grab a bottle of their fine turf, as I end up brushing off most of the larger clumps.
- Using watered down modge podge (roughly 1:1), I applied a faint coating of Woodland Scenics Yellow Grass Fine Turf to the ground. This stuff works way better than the above because it has the right sized particles.
- I then used 1:1 modge podge to create tufts of static grass all over the base. I use a custom blend of static grasses and turfs designed to emulate an ancient container of GaleForce Nine Winter/Dead Static Grass which I keep untouched as my benchmark sample.
- I then used 1:1 modge podge to create a few clumps of Scenic Express Light Green Coarse Flock & Turf. This looks great for little shrubs.
On the sea inlet, I went a bit further. I looked up some examples of seashore flora and found some nice examples which inspired me to add flowers, bushes, etc.


I hope you found this blog entry both educational and entertaining, possibly even inspiring! Stay tuned for more hobby articles soon.
-Nick


Great stuff - some good tips there some of which I will try myself and the end result is excellent.
ReplyDeleteThank you, I'm glad it was helpful!
DeleteGreat glamour shot. It's amazing the amount of work that can go into a single photo. The water blends look very smooth. Well done all around.
ReplyDeletethank you!
Delete