Imperial Skies: Kaiserliche Marine
Hey guys, welcome back! Rather than continue my Gunpla grind, I took a slight diversion, ending up in the skies over Europe, circa 1914. Behold, the Kaiserliche Marine!

I've been sitting on these Imperial Skies Aeronef minis from Brigade Models for a hot minute now, so it seemed like they deserved a little love.


I've been sitting on these Imperial Skies Aeronef minis from Brigade Models for a hot minute now, so it seemed like they deserved a little love.
These kits are tiny, I mean, really small. I'm used to 15mm scale (1:100), but these are 1:1200. Regardless, I felt up for the challenge and change of pace. The older I get, the more I enjoy starting projects with a definite goal, rather than an open-ended, sprawling slog. Entering this project with the goal of completing a nice, little, manageable fleet is refreshing.

Here are all the bits that came with the set.

As you can see, these are white metal kits. They're quite small, but thankfully the thicknesses of the masts are substantial enough to prevent any bending or snapping. Cleanup was pretty straightforward using just a metal file, needle file, emery board, and sand paper.

Here they are with all their parts assembled, minus the turrets. I decided to leave these off the battleships as long as possible, since painting around them would be difficult.

But, why stop there? The Imperial Skies book has a great section by Robin Fitton on how to add 1:700 scale nautical bits to your ships and I was definitely inspired. I grabbed a few different kits from Japan online and started to lovingly detail.


Of course, I was way out of my depth, so much naval research was needed. I always love doing research and deep-diving into the history/lore of whatever I'm working on.

A rangefinder added above the bridge. Also notice the anchors.

Here's a shot of the fleet with all their new, shiny bits added.

On this Markgraf Class Battleship, you'll notice antennae, antiaircraft guns, searchlights, flagpoles, and a broadside of guns have been added.

This Köln Class Armored Cruiser has been given anchors, a rangefinder, small mortal platforms to the bridge, a small broadside armament, and a flagpole.

This Emden Class Cruiser has been given an anchor, rangefinder, searchlight, rear AA gun, and flagpole.

This SA15 Class Patrol Nef I went a little bonkers with. Unable to stop myself at just the rangefinder flagpole, and anchor, I also added a depth charge mortar (aka K gun) and twin depth charge racks

While I don't know how the hell depth charges would function in aerial combat, I imagine them as altitude-controlled chaff bombs, or something.

Lastly, a teeny VA7 Class Patrol Nef. This guy was so small that all I could fit on it was a rangefinder and flagpole.

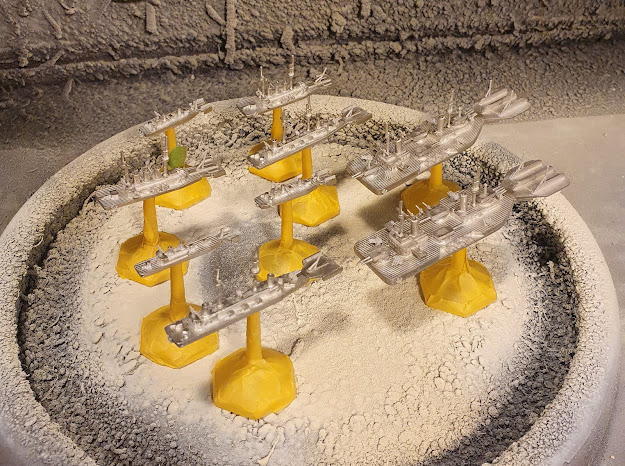
Ok, ready to prime! I made sure to carefully mask out the flying stands for these, since they are nice, clear plastic. I could have opted to leave the stands separate, but they provided a nice little grip to hold and manipulate the Aeronefs.

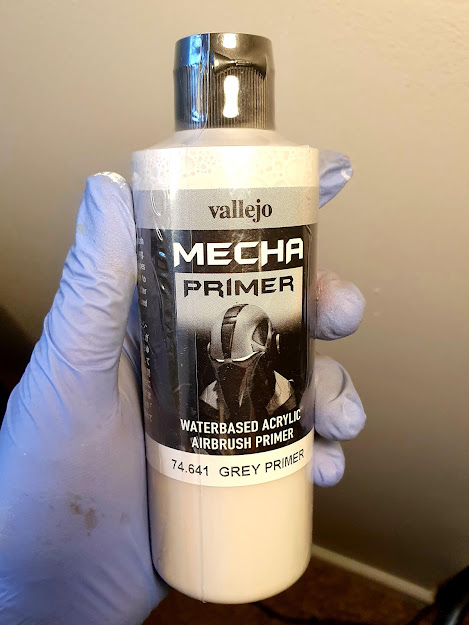
For this project, I tried something new: airbrushed primer. I normally just use a good ol' rattle can, but given the fineness of the minis, I was afraid that the spray primer might fill in the lines along the deck or hide some other details.

All ready for primer!

Primed! Overall, the grey primer was a breeze to use, though I (as always) needed to fiddle with my damned airbrush. I ended up needing to replace the nozzle, as mine always seem to break after a few months of use. One downside, I will admit, is that I found this primer peels more easily than spray primer. This became a little bit of an issue when trying to remove errant dust particles or hair.

I then used this new (to me) white acrylic paint to provide a zenithal highlight. I much preferred it to using white spray primer, though I found it comparable to Vallejo's white airbrush paint.

All lovely and zenithal'd.

Back to the workbench!

Here's my palette for the project. I also used a little vermillion paint, but only for extreme highlights.

Firs things first, the deck. This was the most "recessed" area of the ship, so I wanted to make sure it was painted first. I painted this with a wash or two of light brown.

I next gave the deck a was of Army Painter soft tone to better define the individual planks.

Voila, soft tone.

All the decks are done! I'll spare you the base coat for every different color, but you get the idea.

For the next step, I really wanted to add some iron crosses to the tail fins of the Nefs. However, I didn't have any decals available in scale, so I had to make some myself. I jumped into Photoshop and quickly made some quick grids of the pattern, then printed them out on basic printer paper.

As carefully as possibly, I glued these down with some lightly watered-down white glue. I then coated them with a few layers of satin varnish to lock them in place and waterproof them against washes and inks.

Looking very cool.

In order to add the red "water line," I painted about half the hull red. I then masked off the bottom half. I'm aware these are Aeronefs, i.e. airships, so they wouldn't actually sit in the water, but the look was so distinctive I couldn't help myself. I did a little research on the origin of water lines: turns out the red paint was created/inspired by the copper used in the paint, since copper repels aquatic critters.

After masking off the red, I then carefully painted the hull grey to complete the effect.

The whole fleet, base coated.

To bring out the details of the minis, I used a combination wash of Army Painter soft tone, blue tone, green tone, and some mop glo.

Inked and ready for highlights.

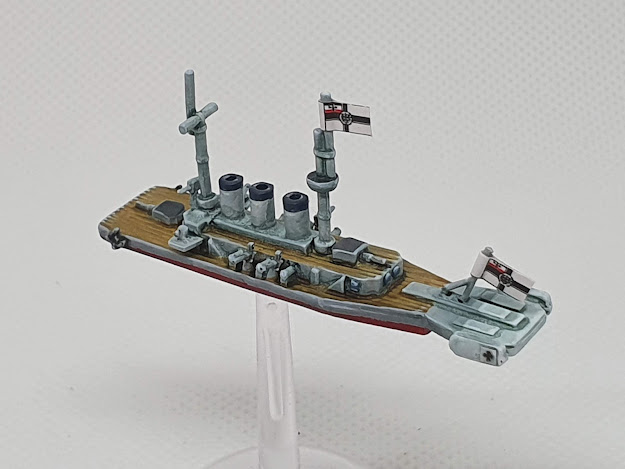
Here's the fleet, post highlight. I keep my highlights fairly simple. After a wash, I re-highlight the details using whatever the base color was, then provide a more extreme highlight using a lighter shade of whatever base color was originally used. In some cases, I'll do a point highlight of white, or whatever, on the most raised areas.

As a final touch, I added some of the provided flags to their poles. I also cut some smaller flags for the ships which couldn't fit the grander ensign flags.


Pennies for scale.

I hope you all have enjoyed this quick departure from gunpla- back to the Sinanju I go! Stay tuned for more updates.
-Nick


Great stuff. I've got a few nefs partly painted. I really should have invested in some gubbins as your extra AA guns and range finders etc add a lot to the models. Thanks for sharing a detailed 'how it was done' post.
ReplyDeleteThanks for the comment, I'm glad you enjoyed them! 😁
Delete