Gunpla Build: RG 22 Sinanju MSN-06S (1/144): Painting!
Hi everyone, welcome back!
Here's an update on my enormous, scope-exploding, gundam build. I initially approached this project from the naive mindset of a relaxed hobbyist, but, of course, my own mental hangups have spun this project out of control.
Rather than just some some clean painting and light weathering, I have gone the foolish route of edge highlights, washes, extreme highlights, shading, etc. I've even broken our non-provided decals because the provided stickers are the worst things I have ever worked with. Seriously, if you are going to paint your gundam, DO NOT use the provided stickers: they will never sit right, peel, pool ink, and are relentlessly glossy. Awful.
Anyway, let's look at some pics.


Time to start the laser rifle. This was a pretty fun, characterful part to paint.


Here's an update on my enormous, scope-exploding, gundam build. I initially approached this project from the naive mindset of a relaxed hobbyist, but, of course, my own mental hangups have spun this project out of control.
Rather than just some some clean painting and light weathering, I have gone the foolish route of edge highlights, washes, extreme highlights, shading, etc. I've even broken our non-provided decals because the provided stickers are the worst things I have ever worked with. Seriously, if you are going to paint your gundam, DO NOT use the provided stickers: they will never sit right, peel, pool ink, and are relentlessly glossy. Awful.
Anyway, let's look at some pics.

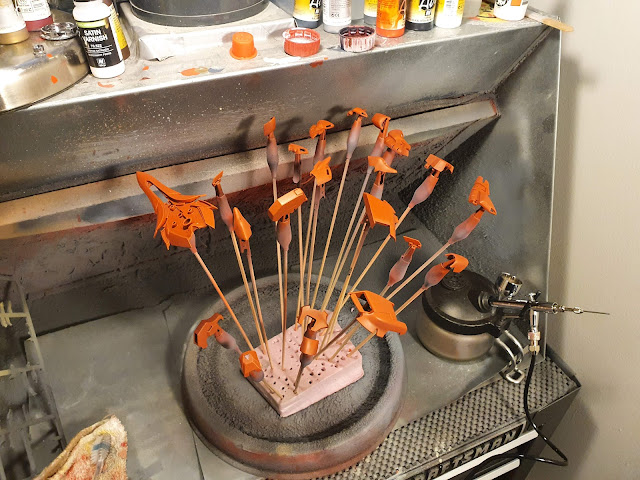
I started by doing as many red pieces as possible. This required multiple stands and airbrush sessions, as there are a lot of little bits.

Here's the primed laser rifle. Exciting stuff.


I gave this a coat of Vallejo Engine Grey via airbrush.


Next, a nice zenithal spray of Vallejo Light Grey. It was at this point, to my horror, that I realized I had left off the underslung grenade launcher. More on that later.

Here's a layout of some of the pieces that are now ready for assembly.

I can't believe how many exterior pieces there are- it's insane.

Another layout shot. If not the entirety, this is at least the majority of parts needing assembly and (foolishly) stickers.

After assembly, it was time for a satin varnish. Satin varnishes are great for locking in the paint and providing protection for oil washes.

Oh no, that grenade launcher. I added it in, but needed to re-paint the gun. Oh well.

Here's a very nice little piece that's looking up to snuff. Unfortunately, it has a sticker. This will attach to the side of the leg.

Another nice piece, a hip thruster. Check out that heat discoloration on the cone.

Here's the shoulder pad, once again with stickers. I regret adding these so badly.

Here's the rear jet pack assembly. This thing is pretty big.

Here's the full leg, minus side thruster (shown above). These parts are now ready for oil washes.

Let's do some highlights! Here's the head piece post ink wash. I felt it looked nice, but it was a bit too dark and flat. Foolishly, I broke out the paints and started doing highlights.

For the highlights, these are the paints I used. I started with an edge highlight of Vallejo vermillion, followed by a finer edge highlight of skin tone. After the skin tone, I used a light wash of P3 red ink to dumb down the intensity of the skin tone, then used skin tone to do a dot highlight on the most extreme points.

The initial vermillion edge highlight.

The skin tone edge highlight.

The red ink wash.

Lastly, the skin tone re-highlight. Looking sharp!

To highlight the grey, I used an edge highlight of Vallejo grey blue, a finer highlight of sea grey, and finally a point highlight of sky grey.

It's all coming together.

Time for some battle damage! I used this Faber-Castell 6B pencil to add some scrapes and dents to the armor.

Beneath each scrape, I re-highlighted using the same reds as shown above. These add depth and draw attention to the battle damage.


You'll also notice some scrapes painted in. These didn't require pencils, just some fine lines painted in skin tone, followed by red ink.

Here are the very lobster-like shoulder pads. Notice the scratches on the raised areas to simulate natural lighting.


Below are some shots of the head and shoulders together.


I started with a highlight of light grey on all the grey areas. The hand was painted earlier separately before being attached.

I then detailed the rest of the rifle. I painted the optic wire yellow and used black to create hazard stripes. I also added a nice object-source lighting to the bottom of the scope, showing where the glow of the laser sight would illuminate. The inside of the scope was highlighted with green, to simulated the scope's bounce lighting.


You'll notice I also added decals and heat discoloration to the muzzles. I felt the gun needed a little more "oompf"... these did nicely!

For the black areas of the gundam, I used the above colors. I did an initial highlight of grey blue, a fine highlight of pale blue, a subdued wash of Army Painter blue tone, finalized by a point highlight of pale blue. I'm quite happy with the look so far, despite the increase workload.


I'm still working on this kit, but damn, it's a lot of work. You'll notice I've also added additional decals to balance out some of the stickers I removed, as they were bringing the overall quality of the model down. I used some old Warhammer 40,000 decals, as well as 1/100 scale railroad decals from my library.
Thanks for reading- stay tuned for more updates!
-Nick


Comments
Post a Comment