Hobby Update: Warhammer 40,000 Iron Hands 004
Hey folks, welcome back.
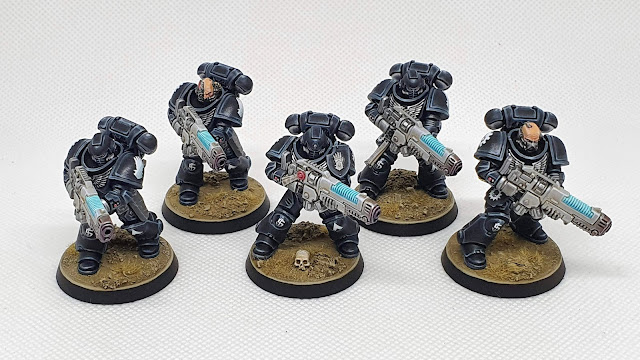
This blog focuses on a new addition to my Primaris Iron Hands force, a unit of Hellblasters (also from the Dark Imperium boxed set).


This blog focuses on a new addition to my Primaris Iron Hands force, a unit of Hellblasters (also from the Dark Imperium boxed set).

These guys were fun to paint up, though a bit more time-intensive than the standard intercessors. Below are some WIP shots, mostly surrounding the plasma guns and how I achieved my desired effect.
The body and weapons of the marines, for the most part, were painted in the same style and using the same methods listed in previous blogs, so I won't cover them here. The plasma coils and other effects, however, you can find here.

A plasma gun with completed white casing.
Step 1: To start, I painted the plasma coils a solid white. I used both Vallejo Foundation White 70.919 and White 70.951 to create a clean, even, and opaque coat.

Step 2: Using P3 Arcane Blue, I created a wash with a small amount of my homemade thinner medium (4 parts Mop Glo, 5 parts water, 1 part windshield wiper fluid). I'll be layering this over the coils to give them a nice shade to the recesses.

I keep used bottle caps for exactly this kind of purpose. Yes, I have a palette, but why bother cleaning it when you can just toss/recycle these when they become no longer usable? After all, who doesn't want a second lease on life?

Here, the plasma coils have been given their first wash of the aforementioned mix.

Here's the effect after a second wash. Nice and easy does it every time.
Step 3: Using thinned Vallejo White 70.951, I carefully highlighted the tops of each coil. Patience pays off here. Afterwards, I added a second highlight to the outermost corners of each coil to really make them pop.

Step 4: Using some Army Painter Blue Tone, I ran my brush along the bottom of the coils, adding a bit of shadow and further contrasting the coils against the white gun frame.

Step 5: Plasma Gets Hot, so this weapon should feel like it! Using a series of progressively cooler ink hues, I created a heat discoloration on the metallic barrel. From left to right, I used Army Painter Flesh Wash, Red Tone, Purple Tone, and Blue Tone. I then provided some edge highlights with Vallejo Steel 71.065 and Aluminum 71.062 to tie it together.


Remember, hotter discoloration is cooler in hue, so the areas that get most hot will be the most blue.

Another gun looking crisp.

The sergeant's gun received the same treatment.
Here is the full set of guns, waiting to join their bearer's body.

Once attached, it was time for final touches, like decals, matte varnish, and basing. Altogether, I think the squad came out nicely.


Here's a squad member sporting a classic space marine head from my bits box.


My entire primaris force, thus far.
I hope you enjoyed this post, stay tuned for more updates.
-Nick


Comments
Post a Comment