Hobby Update: Demonic Stingrays and Etsy
Hey folks, welcome back!
This blog took a bit of time to prepare as there was a whole mess of work required to pull it off. In this blog, I'll be discussing the steps I took to create my 15mm demonic stingrays (which will count as flying creatures in my Otherworld warband for SAGA Age of Magic).
People say "necessity is the mother of invention." In my case, the saying should read, "can't find the damned thing I want, guess I'll make one."
Magical and spiritual rays exist in Maori mythology: rays are the children of Punga, a supernatural being, and Whaitere was a guardian spirit in the form of an enchanted stingray. If you want to get really off the beaten path, there are even flying ray cryptids reported in Mason County, West Virginia and South America.
Anyway, you didn't come here for a history lesson or to hear about pacific mythology or bizarre cryptids, so let's get to the fun stuff!
I began the project by cutting some pieces of plastic card into the main body and tail sections. These would serve as the core of the miniature which I could build upon.


Next, I used yellow Milliput to create a general form.

After this had cured, white Milliput (which is softer and smoother than yellow) was used to finalize the forms and smooth out the organic transitions.

Once this second layer cured, I went back to sand and file the forms. I used multiple emery boards and different grains of Testor's sand paper.

Now, on to the fine detail sculpting. I began by building up layers of ProCreate mixed with red Sculpey III (thus the reddish hue). The eyes were made using microbeads.

Once this cured, another layer of ProCreate/Sculpey III was added, creating the final level of details. I also added small bumps along the surface using super glue.

Lovely! Now, on to mold making. Before pouring my mold, I created flow ports and bubble vents to aid resin pours. I used styrene rods to build these structures and some discarded cap.

Mold making isn't terribly difficult, but can be easy to mess up. I use Smooth-On OOMOO 25 for my silicone molds and make sure to de-gas my silicone in my vacuum chamber before pouring. I also found that, in order to make sure my silicone cures completely, the following steps really help.
1. Pour out equal parts of component A and B in separate cups.
2. Mix part B into part A's cup, as it flows more easily. Mix them thoroughly while constantly scraping the sides and bottoms of the cup.
3. Once mixed, pour the combined silicone into a third, previously unused cup. Mix again. This prevents any lingering, unmixed silicone from the sides or bottom of part A's cup from causing problems later on.
4. De-gas the mixed silicone quickly in your vacuum chamber, if you have one. Wait until the silicone rises and then falls back into its cup.
5. Pour your de-gassed silicone from a high distance (about a foot) above your mold's enclosure. By letting the silicone thin out during the pour, you decrease the number of bubbles in your silicone.
6. Let cure!
I use a knock-off Lego mold box that is fixed in place to a styrene sheet using hot glue.


1. If you have issues with your resin flow, try warming the resin components separately before mixing. This will make them flow more easily, but it will also decrease the amount of time you have before the resin cures.
2. If you have issues with your resin flow, try warming the mold itself. I throw mine under a heat lamp on occasion.
3. If you have issues with your resin coating the inside of your mold, try coating the inside with baby powder.
Here's how my casts turned out! You can see the filled bubble vents and pouring spouts, as well as some flashing along the mold lines. These are easy to remove with a scalpel or small scissors.


To base my stingrays, I used clear styrene rod, a drilled out piece of balsa wood, and a nickel. I also make sure to cover the styrene rod in masking tape, so that my primer and paint don't accidentally ruin the flight stand. I painted several different color schemes and themes onto my stingrays, since I wanted to show the versatility of the sculpt.
Au Naturel
This color scheme was inspired by real-life stingrays, manta rays, and sharks.


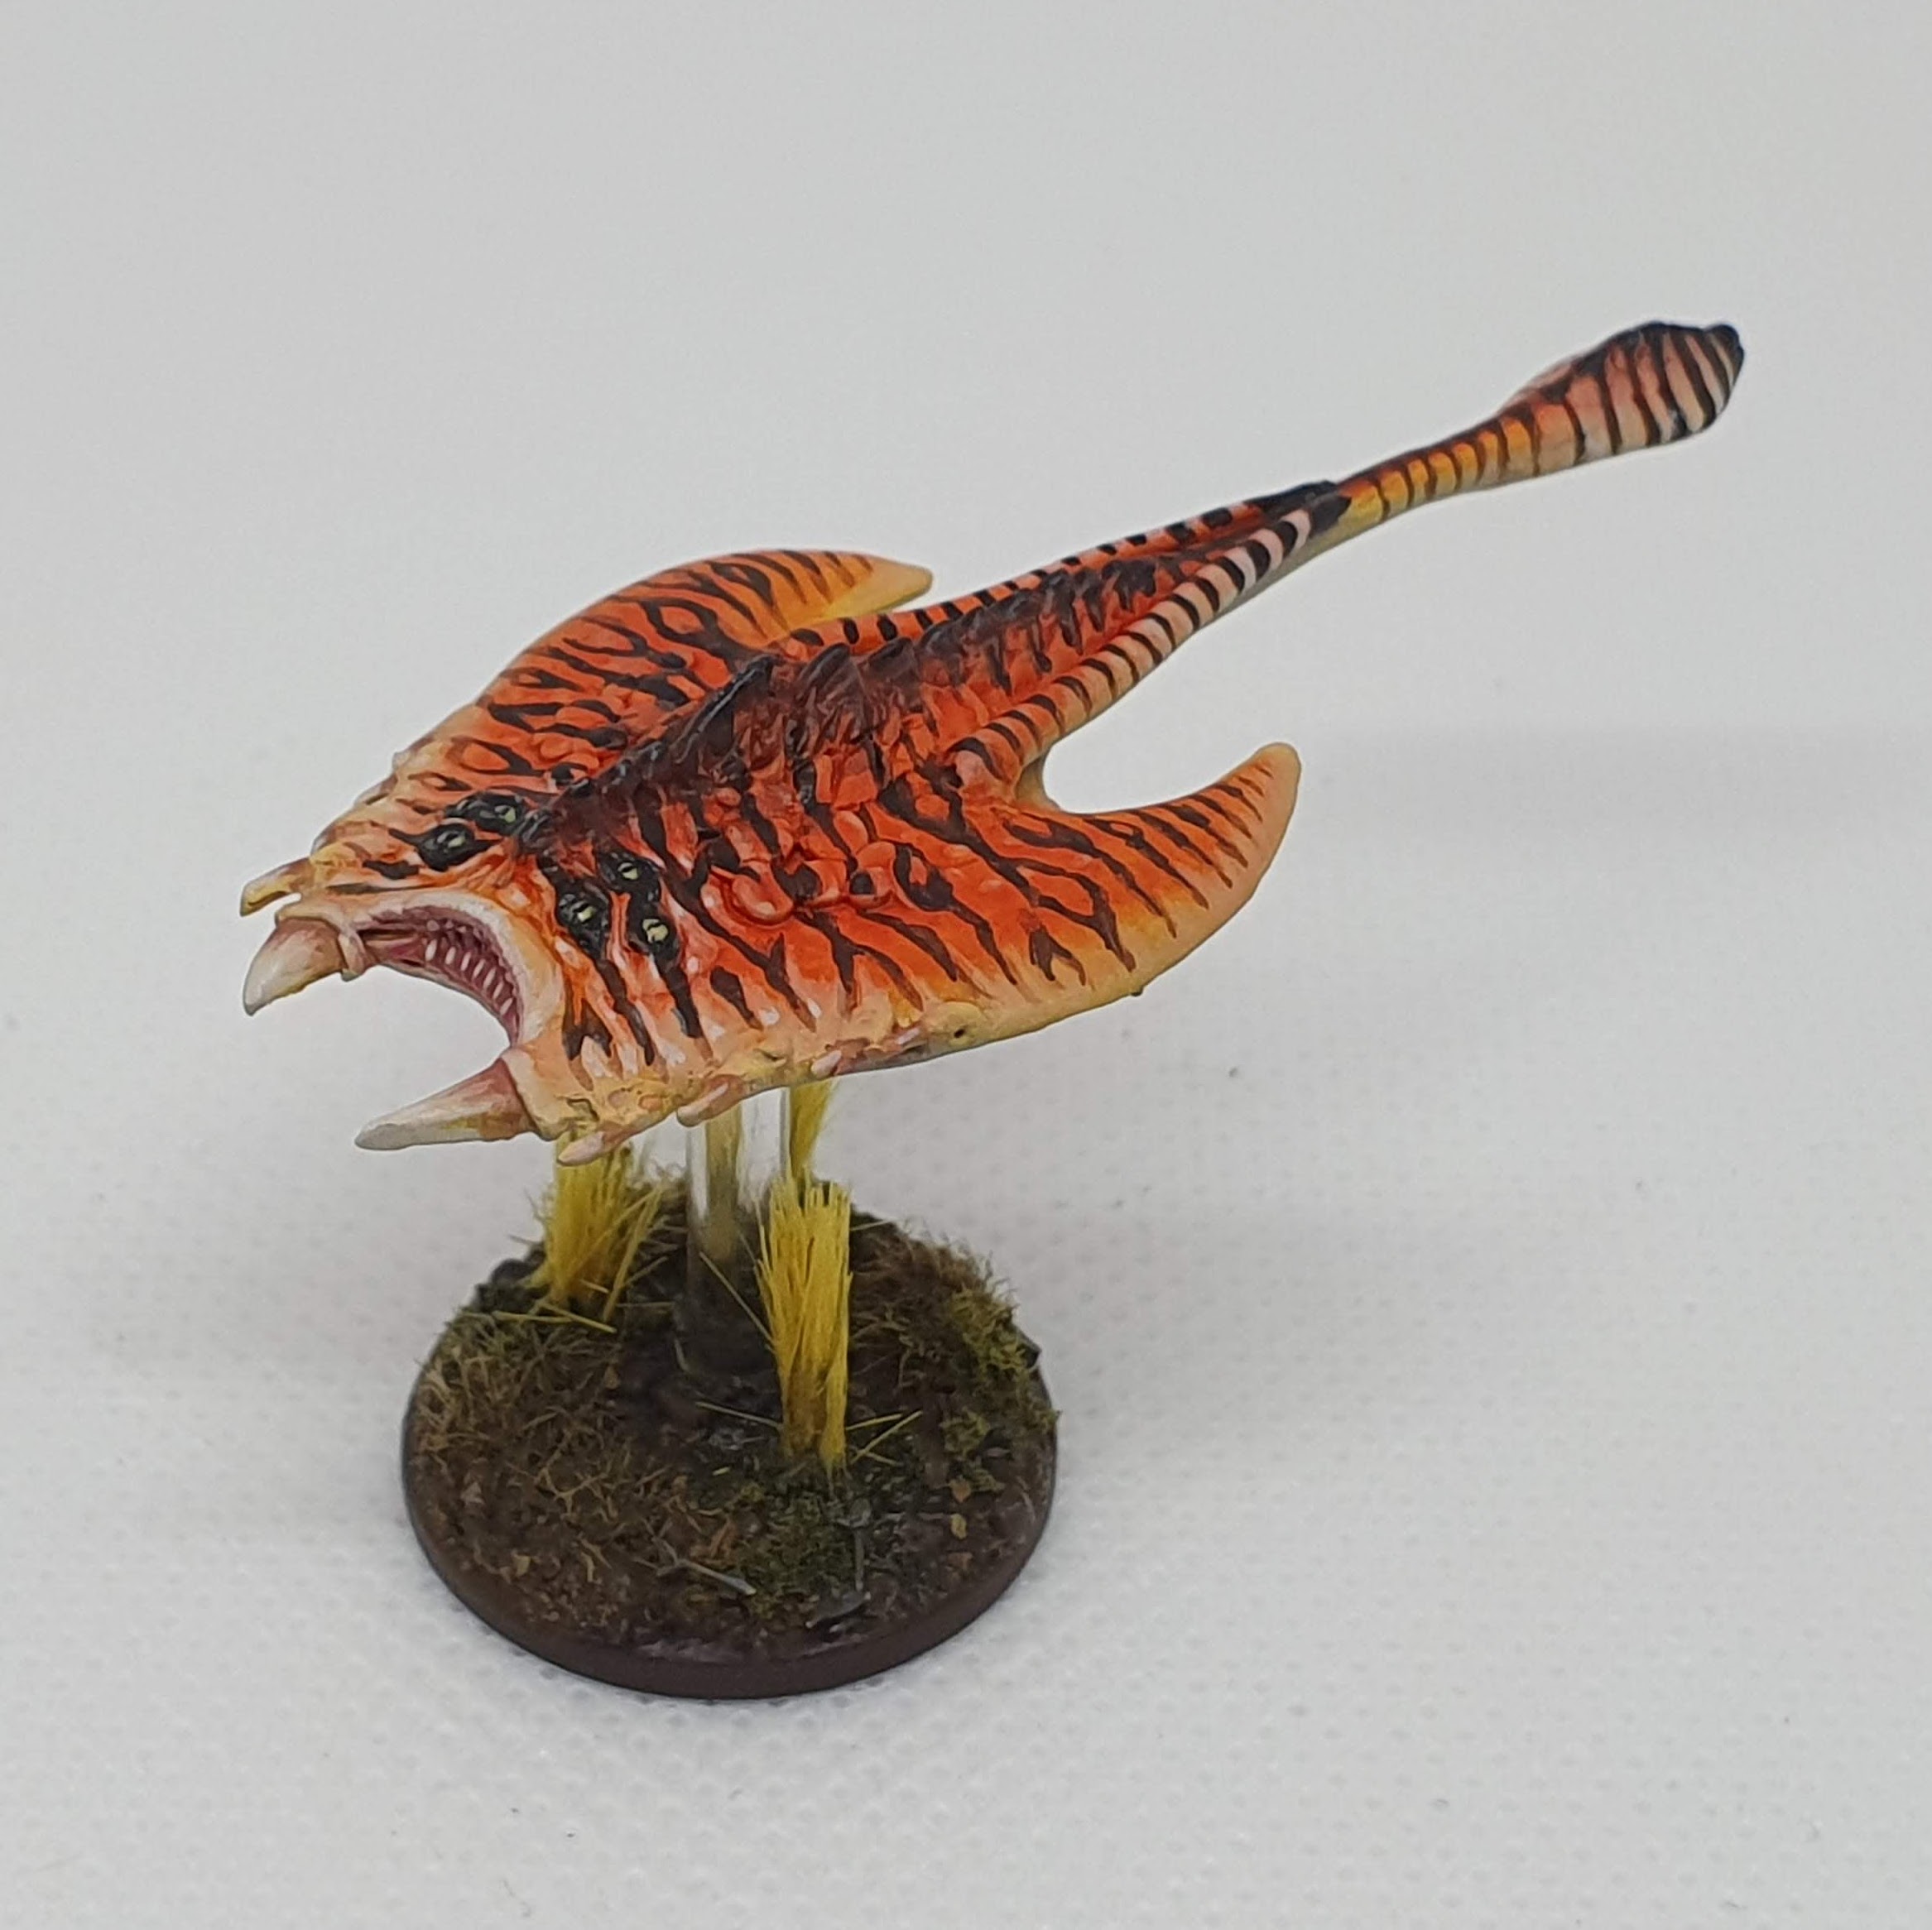
Tiger Ray
Let's go wild! This was a fun, clearly tiger-inspired scheme that provided me the opportunity to go really vibrant and crazy.


Here is the palette I used for my Otherworld's flying creatures. I wanted a color scheme that matched the rest of my army, as you can guess.


Anyway, thanks for coming by! I hope you've enjoyed this blog entry and hopefully have learned something about sculpting, mold making, and resin casting. If you're interested in picking up a copy (or several) of my demonic stingray, please feel free to check out my Etsy store here:
All the best,
Nick
P.S. Here are some alternate paint schemes for my Demonic Saucers, also available on my Etsy.


Comments
Post a Comment