Hobby Update: The Otherworld
Hey folks, welcome back!
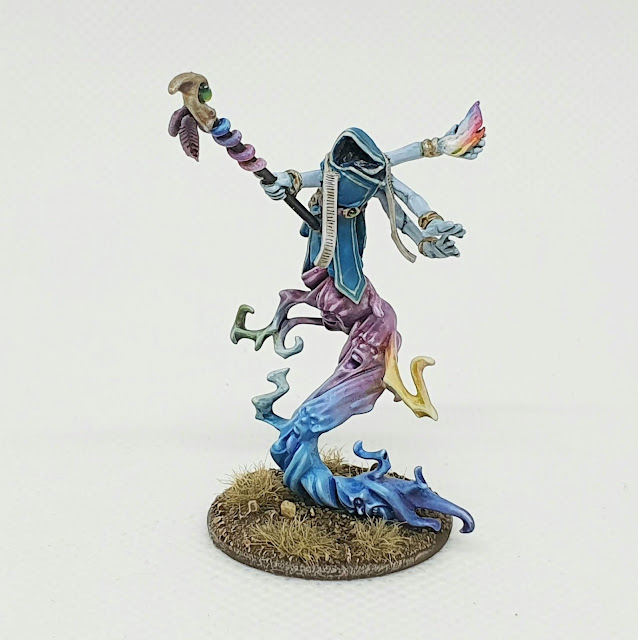
In this blog, we'll be focusing on my newly completed sorcerer for my Otherworld warband in SAGA Age of Magic.
The Changeling in its most recent iteration.
SCULPTING
So, where to begin? I started by creating a rough, floral wire armature of the figure and mounting it upon the sorcerous flight stand that came with an Tzaangor Enlighted I purchased off Ebay.
A humble beginning.
I next began layering on ProCreate in order to add some mass and anatomy to the developing form. The lighter putty was white Milliput, the most fine and soft version of the medium.
A small length of .5mm brass rod served as my staff, or at least the simple foundation of one. From there I began adding additional details, like hands, a belt, and further layers of cloth.
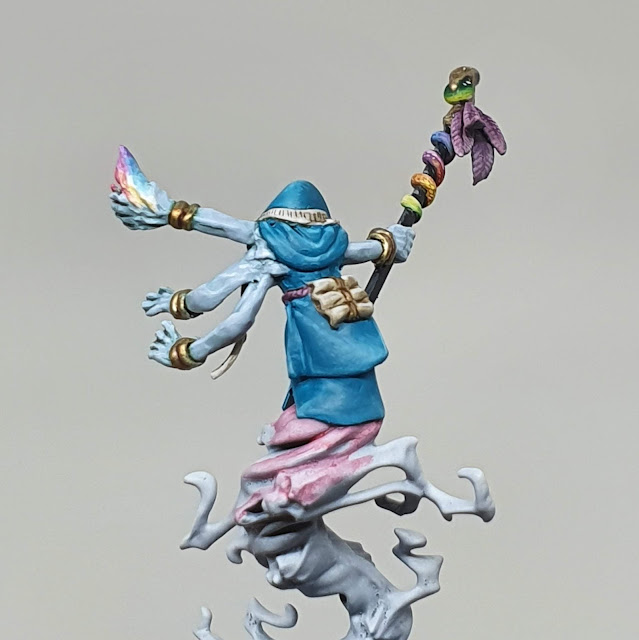
Next up, the final details. Using primarily my ProCreate/Sculpey III mix, I added a twisted tentacle/serpent thing around the staff, some feathers, bracelets, a flame in its palm, and some back scrolls. I also refined the chest cloth, as I wasn't happy with the previous version.
There we a bunch of things I learned during this process, which I'll try to convey below.
1. Keep clean water and petroleum jelly handy. These are great for smoothing areas and preventing your putty from sticking to your tools or fingers. However, it will also prevent your putty from sticking to itself, so there's that.
2. Having more tools never hurts. I use metal and silicone sculpting tools, as well as even some tools I crafted/appropriated for myself from random household objects.
3. Junk brushes can be used with petroleum jelly to smooth areas otherwise too delicate for other tools.
4. With fiddly stuff, like hands, it's often best to sculpt them separately, then attach them. I use a dot of super glue at the wrist in the above example, then blend with another layer of thinned putty.
5. Make a small putty oven for yourself. I've had one for years now, it's great for curing putty faster, but also to accelerate ink washes and basing glue. Mine is made of an empty coffee can and a heat lamp.
What my oven lacks in looks it makes up for in utility.
7. Don't be afraid to rework areas. I often revisit areas of my sculpts with fine sand paper, a file, putty, or a scalpel to rework them. Partly cured areas can be manipulated with hard tools to add surface details, as well.
PAINTING
Next up, let's get some colors on there. I began by picking out the cloth, skin, and scrolls.
I then picked out the gold, gems, feathers, staff, flame, and belt. I also finished highlighting and detailing the scrolls, as they needed some fine text. I was unhappy with the staff at this point, as the twisty tentacle thing was a bit too Froot Loop or Fisher Price feeling for me. Likewise, I was intimidated by the swirling vortex of demonic faces that made up the flight stand.
The indignity.
After much deliberation, I revisited the Froot Loop stick and buckled down to work on the flight stand. I'm much happier with the final effect of the staff and how the stand turned out. Likewise, I revisited the robes and added a trim.
Overall, I'm really pleased with how this miniature turned out. I'm still not terribly comfortable with sculpting, so this project really helped me learn a bit more about useful practices. Likewise, I needed to work on my fine brush work and blending skills in order to pull off the fine details and polychromatic fades across the miniature.
Hopefully you've enjoyed this post and feel inspired to do some sculpting of your own! Stay tuned for more posts soon.
-Nick


Comments
Post a Comment