SAGA Age of Magic: SOLO SHOWDOWN
I finally found a worthy opponent...MYSELF! I was dying to play this weekend and since I had some free time (and two warbands) I decided to try a game of solo SAGA: AOM. I played 4 pts, Lords of the Wild vs The Undead Legion.
LORDS OF THE WILD 4pts (Minotaurs of the Black Hills)
Warlord
Sorcerer 1 pt
Creatures 2 pts
Behemoth 1 pt

LORDS OF THE WILD 4pts (Minotaurs of the Black Hills)
Warlord
Sorcerer 1 pt
Creatures 2 pts
Behemoth 1 pt

THE UNDEAD LEGION 4pts
Warlord (flying beast mount)
Lieutenant .5 pt
Warriors 1.5 pts
Warriors with bows 1 pt
Quadrupedal creatures 1 pt

I wanted to do this right, since certain gaming partners of mine now believe the Undead to be "broken."
I played Clash of Warlords and rolled off per each side, as if individual players. I also used separate dice for each warband as to not cause confusion.
LotW won the roll off with a 6.
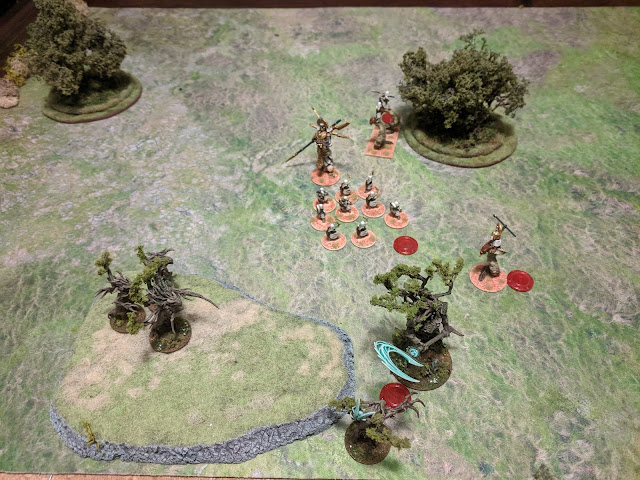
Each side then alternated placing terrain as prescribed in the scenario. I did my best to "screw myself over" as well as I could, as if I were playing each warband singly. The LotW placed a small area of woods (ideal for Rise of the Spirits!) in the center. Undead want minimal terrain, so they put a hill on their own side of the deployment. LotW then placed more trees, because I wanted as much of the field covered with trees as possible (left side of field). Undead then moved that area of woods away, signalling the LotW player to place one last piece of terrain. Lastly, LotW placed a final copse of trees fairly close to the hill (right flank).
LotW then rolled a 4 for deployment, and went with deployment B (diagonal).
For deployment, LotW went first, deploying half their force, including warlord. I placed the warlord and his two creature units as close to the center diagonal as possible.
Undead then placed their whole warband, hugging the hill for a refused flank.
LotW finished by placing the sorcerer behind the warlord and the behemoth on the left flank of the Undead.


TURN 2: UNDEAD
The Undead warriors struck back with a vengeance, easily wiping out the pathetically exhausted creature unit. The warlord likewise flew past, readying to strike in following turns. The archers were resurrected and seized the opportunity to snipe out the exhausted sorcerer, but somehow whiffed the needed dice rolls (I'm not sold on archers actually being worthwhile yet). Now down a SAGA die, things are looking grim for the LotW!

TURN 3: LORDS OF THE WILD
"When in doubt, ATTACK!" -George S. Patton
Things were looking precarious for the LotW, so I decided to be even more aggressive! Using the warlord's We Obey, I hurled the behemoth into the already weakened warrior unit. Even under the aegis of Already Dead!, the archers took a savage beating, ending up exhausted and losing four more models! They then withdrew away from the hill. The sorcerer cast Transformation on himself, becoming a warlord mounted on beast and declared a charge on the fleeing archers. Using fatigue to short the charges, rather than most likely get wiped out.

TURN 3: UNDEAD
Ouch. I can honestly say I did not see that coming (hard to believe, but true). The SAGA dice and magic dice add a lot of variability, so while I can understand general strategies and predict most tactics, I can't necessarily know exactly what's going to happen until those dice roll.
The Undead resurrected some of the fallen archers to get them back at SAGA dice-generating numbers. Also, adding some more bodies to a unit is never a bad idea. The warlord flew closer to support the crumbling flank, as did the lieutenant. Unfortunately, down a SAGA die and limited by really poor SAGA dice, The Undead were left with few options for the turn.

TURN 4: LORDS OF THE WILD
As one might expect, the LotW capitalized on the poor rolling of the Undead and once again rushed in to crush the exhausted archers. Revenge! Now, both sides were down a single unit and a single SAGA die. The Undead lieutenant suffered a fatigue for being too close to the wiped-out archers. This behemoth was proving itself to be a REAL threat, especially when combo'd with the constantly transforming sorcerer.
TURN 4: UNDEAD
Determined to turn the battle around, the Undead began their turn. The remaining warrior unit had two models resurrected and advanced to jam up the warlord and creature retinue (they also had an Already Dead! sitting active on their SAGA board). The warlord charged the Behemoth and managed to do some damage, but overall both had very little effect on one another (dice rolling was pretty pathetic for both sides and Black Knight absorbed one of the warlord's suffered casualties). Frustratingly, the Undead never seemed to have enough dice to do much with their fatigued creature unit. In observance of proper etiquette, the lieutenant ran as far away from the fray as possible.


TURN 5: LORDS OF THE WILD
Before I begin this turn, let me say, magic is really cool. This turn was absolutely wild and I think I even shouted in disbelief a few times at how crazy things got.
To start, my sorcerer cast Animal Prowess on the behemoth using the MAXIMUM effect. For the uninitiated, this caused my behemoth to remove two fatigue, then activate again for free. I chose to use the free activation as a rest (removing fatigue does not count as resting), therefore reducing his stack of three fatigue to zero. However, the cost for such extraordinary magic was that my sorcerer had to roll on the Abuse of Power table (the spiritual successor to WHFB's Miscast table). I rolled a 9, meaning the sorcerer would suffer a magical backlash and, on a roll of 4+, forget his spell for the rest of the game! To much excitement, I rolled a 3, meaning Animal Prowess could be used the following turn, if need be.
From my experience, the only way to wipe out Undead warriors are through multiple, dedicated charges. This turn, the LotW charged the skeletal warriors with the remaining creature unit, warlord, and sorcerer (once he had used Transformation to become a warlord mounted on beast!). Even with Already Dead!, the warriors stood no chance and were completely wiped out. The remaining Undead looked on with empty eye sockets in disbelief.


TURN 5: UNDEAD
Yikes! Down to only two SAGA dice, the Undead had very few options left. The warlord pulled back behind his lines and the remaining Undead units rested as much as possible in preparation for the oncoming final turn.

TURN 6: LORDS OF THE WILD


After unleashing so much carnage, the LotW were sitting pretty with a victory easily in hand. However, as every unit within charge range was fatigued, and the Undead still had one more turn, charging in fool-hardily would have been a grievous error. Instead, the warlord and creatures rested, then formed-up into a bodyguard block that could withstand most chargers.
The behemoth stayed in place, as three SAGA dice can only be stretched so thin (even with Determination and We Obey).
The sorcerer, on the other hand, solidified his role as MVP.
First casting Animal Prowess on himself, he removed a fatigue. Then, he cast Transformation, becoming a flying creature. Using his newly sprouted wings, he soared over to hide behind one fortuitously located clump of trees. When things couldn't seem to get any worse for the Undead, the LotW activated Rise of the Spirits, turning the small grove into a fully-formed, lumbering titan! The LotW then charged this newly-born titan into the Undead's quadrupedal creatures, exhausting them. The titan took several wounds in reply, but at the end of the turn resumed its role as a passive terrain piece. Unfortuantely, the LotW didn't have another unit handy to finish off the Undead creatures, but the effect was still fairly dramatic.
TURN 6: UNDEAD


With only two SAGA dice available, two fatigued heroes and an exhausted unit of creatures, the Undead were in a sad state. Rather than accept their defeat quietly, they prepared one final assault to hopefully snatch victory from the jaws of defeat (or at least a draw)!
The Undead warlord flew headlong into the LotW bodyguards tearing them limb-from-limb (get it?). The LotW warlord suffered a fatigue, seeing his companions so unceremoniously dispatched. Next, the Undead Lieutenant slithered up to the exposed LotW warlord and mercilessly struck with bronze spear. However, despite his best efforts, he only managed to land an additional wound onto the warlord, far from enough to finish him off.
GAME SUMMARY: DRAW
LORDS OF THE WILD: 12 massacre points
Warlord (flying beast mount)
Lieutenant .5 pt
Warriors 1.5 pts
Warriors with bows 1 pt
Quadrupedal creatures 1 pt

I wanted to do this right, since certain gaming partners of mine now believe the Undead to be "broken."
I played Clash of Warlords and rolled off per each side, as if individual players. I also used separate dice for each warband as to not cause confusion.
LotW won the roll off with a 6.
Each side then alternated placing terrain as prescribed in the scenario. I did my best to "screw myself over" as well as I could, as if I were playing each warband singly. The LotW placed a small area of woods (ideal for Rise of the Spirits!) in the center. Undead want minimal terrain, so they put a hill on their own side of the deployment. LotW then placed more trees, because I wanted as much of the field covered with trees as possible (left side of field). Undead then moved that area of woods away, signalling the LotW player to place one last piece of terrain. Lastly, LotW placed a final copse of trees fairly close to the hill (right flank).
LotW then rolled a 4 for deployment, and went with deployment B (diagonal).
For deployment, LotW went first, deploying half their force, including warlord. I placed the warlord and his two creature units as close to the center diagonal as possible.
Undead then placed their whole warband, hugging the hill for a refused flank.
LotW finished by placing the sorcerer behind the warlord and the behemoth on the left flank of the Undead.

Lords of the Wild: DEPLOYED
This was my first game playing LotW or using magic. For my Dominion(s) I chose Earth. My spells were Transformation, Animal Prowess, and Verdant Wakening. I had a theory that Animal Prowess could really buff a creature-heavy warband and that Transformation could make my Sorcerer (normally a squishy target) a real melee monster. Likewise, I wanted to try using Verdant Wakening in combo with Rise of the Spirits for a nasty, unstoppable surprise.

Legions of the Undead: DEPLOYED
I've played quite a few games with my Undead and have yet to lose. They are one of the most defensive warbands out there, and when paired with fast and hard hitting heroes and creatures, they become a real menace. So far, none of my opponents have been able to wipe out a single warrior unit in any of our games. Per usual, my plan was to have my giant warrior unit act as a tar pit, my creatures and warlord threaten with their superior movement speeds, my archers weaken oncoming units/snipe weakened heroes, and for my lieutenant to provide his Black Knight ability for my warlord.

TURN 1: LORDS OF THE WILD
The LotW advance. Turn 1 is mostly about maneuvering into ideal positions for later turns, but I had no idea what I was doing, so I decided to be super aggressive. I also flexed my magical muscle and summoned a small area of trees to protect my warband from would-be chargers.

TURN 1: UNDEAD
The Undead advance on the right flank, bringing the warlord, creatures, and lieutenant into striking range (just outside of M). The archers even manage to wound the Behemoth, putting a fatigue on him.

TURN 2: LORDS OF THE WILD
The trees summoned by Verdant Wakening withered, leaving the field open. Since I had decided to play as aggressively as possible, I went for broke and hurled a creature unit at the Undead quadrupeds with some extra combat abilities added...it didn't work out well. Both units ended up being fairly fatigued, but the LotW creatures were exhausted while Vampirism prevented the Undead creatures from the same fate. the LotW sorcerer then cast Transformation on himself, becoming a flying creature, and charged headlong into the Undead archers. This actually worked out OK, but some great Undead dice rolling left the sorcerer exhausted (uh oh). On the other hand, the archers lost 3 of their number and had to flee. This turn honestly was not looking great for the LotW, as two units were precariously exposed at the end of the turn and ripe for the killing.

TURN 2: UNDEAD
The Undead warriors struck back with a vengeance, easily wiping out the pathetically exhausted creature unit. The warlord likewise flew past, readying to strike in following turns. The archers were resurrected and seized the opportunity to snipe out the exhausted sorcerer, but somehow whiffed the needed dice rolls (I'm not sold on archers actually being worthwhile yet). Now down a SAGA die, things are looking grim for the LotW!

TURN 3: LORDS OF THE WILD
"When in doubt, ATTACK!" -George S. Patton
Things were looking precarious for the LotW, so I decided to be even more aggressive! Using the warlord's We Obey, I hurled the behemoth into the already weakened warrior unit. Even under the aegis of Already Dead!, the archers took a savage beating, ending up exhausted and losing four more models! They then withdrew away from the hill. The sorcerer cast Transformation on himself, becoming a warlord mounted on beast and declared a charge on the fleeing archers. Using fatigue to short the charges, rather than most likely get wiped out.

TURN 3: UNDEAD
Ouch. I can honestly say I did not see that coming (hard to believe, but true). The SAGA dice and magic dice add a lot of variability, so while I can understand general strategies and predict most tactics, I can't necessarily know exactly what's going to happen until those dice roll.
The Undead resurrected some of the fallen archers to get them back at SAGA dice-generating numbers. Also, adding some more bodies to a unit is never a bad idea. The warlord flew closer to support the crumbling flank, as did the lieutenant. Unfortunately, down a SAGA die and limited by really poor SAGA dice, The Undead were left with few options for the turn.

TURN 4: LORDS OF THE WILD
As one might expect, the LotW capitalized on the poor rolling of the Undead and once again rushed in to crush the exhausted archers. Revenge! Now, both sides were down a single unit and a single SAGA die. The Undead lieutenant suffered a fatigue for being too close to the wiped-out archers. This behemoth was proving itself to be a REAL threat, especially when combo'd with the constantly transforming sorcerer.

TURN 4: UNDEAD
Determined to turn the battle around, the Undead began their turn. The remaining warrior unit had two models resurrected and advanced to jam up the warlord and creature retinue (they also had an Already Dead! sitting active on their SAGA board). The warlord charged the Behemoth and managed to do some damage, but overall both had very little effect on one another (dice rolling was pretty pathetic for both sides and Black Knight absorbed one of the warlord's suffered casualties). Frustratingly, the Undead never seemed to have enough dice to do much with their fatigued creature unit. In observance of proper etiquette, the lieutenant ran as far away from the fray as possible.


TURN 5: LORDS OF THE WILD
Before I begin this turn, let me say, magic is really cool. This turn was absolutely wild and I think I even shouted in disbelief a few times at how crazy things got.
To start, my sorcerer cast Animal Prowess on the behemoth using the MAXIMUM effect. For the uninitiated, this caused my behemoth to remove two fatigue, then activate again for free. I chose to use the free activation as a rest (removing fatigue does not count as resting), therefore reducing his stack of three fatigue to zero. However, the cost for such extraordinary magic was that my sorcerer had to roll on the Abuse of Power table (the spiritual successor to WHFB's Miscast table). I rolled a 9, meaning the sorcerer would suffer a magical backlash and, on a roll of 4+, forget his spell for the rest of the game! To much excitement, I rolled a 3, meaning Animal Prowess could be used the following turn, if need be.
From my experience, the only way to wipe out Undead warriors are through multiple, dedicated charges. This turn, the LotW charged the skeletal warriors with the remaining creature unit, warlord, and sorcerer (once he had used Transformation to become a warlord mounted on beast!). Even with Already Dead!, the warriors stood no chance and were completely wiped out. The remaining Undead looked on with empty eye sockets in disbelief.


TURN 5: UNDEAD
Yikes! Down to only two SAGA dice, the Undead had very few options left. The warlord pulled back behind his lines and the remaining Undead units rested as much as possible in preparation for the oncoming final turn.

TURN 6: LORDS OF THE WILD


After unleashing so much carnage, the LotW were sitting pretty with a victory easily in hand. However, as every unit within charge range was fatigued, and the Undead still had one more turn, charging in fool-hardily would have been a grievous error. Instead, the warlord and creatures rested, then formed-up into a bodyguard block that could withstand most chargers.
The behemoth stayed in place, as three SAGA dice can only be stretched so thin (even with Determination and We Obey).
The sorcerer, on the other hand, solidified his role as MVP.
First casting Animal Prowess on himself, he removed a fatigue. Then, he cast Transformation, becoming a flying creature. Using his newly sprouted wings, he soared over to hide behind one fortuitously located clump of trees. When things couldn't seem to get any worse for the Undead, the LotW activated Rise of the Spirits, turning the small grove into a fully-formed, lumbering titan! The LotW then charged this newly-born titan into the Undead's quadrupedal creatures, exhausting them. The titan took several wounds in reply, but at the end of the turn resumed its role as a passive terrain piece. Unfortuantely, the LotW didn't have another unit handy to finish off the Undead creatures, but the effect was still fairly dramatic.
TURN 6: UNDEAD


With only two SAGA dice available, two fatigued heroes and an exhausted unit of creatures, the Undead were in a sad state. Rather than accept their defeat quietly, they prepared one final assault to hopefully snatch victory from the jaws of defeat (or at least a draw)!
The Undead warlord flew headlong into the LotW bodyguards tearing them limb-from-limb (get it?). The LotW warlord suffered a fatigue, seeing his companions so unceremoniously dispatched. Next, the Undead Lieutenant slithered up to the exposed LotW warlord and mercilessly struck with bronze spear. However, despite his best efforts, he only managed to land an additional wound onto the warlord, far from enough to finish him off.
GAME SUMMARY: DRAW
LORDS OF THE WILD: 12 massacre points
THE UNDEAD LEGION: 10 massacre points
Clash of the Warlords requires one player to have a minimum of 8 massacre points to win and at least 3 more than their opponent, otherwise the game is a draw.
This game was full of twists and turns. I initially had the Undead as the decided victors, given my experience playing them and the LotW creature unit being summarily wiped-out so early on. However, midway through the game the LotW really changed the flow of the game, putting the Undead on stumbling back foot. Were it not for the Undead warlord's brutal charge last turn, the LotW would have secured a strong victory. Instead, DRAW!
Tune in for more battle reports and hobby posts in the future.
-Nick


Thanks for the detailed writeup. I've played SAGA (1st ed historical) a couple of times and always struggle to much damage to my opponent (who seems to be a meat buzzsaw). It's probably the need to organize a series of multiple charges on one unit as the LotW did....
ReplyDeleteGlad you enjoyed it, Dave! I've found that's pretty much the secret of SAGA, though it's not unlike most strategy games. Essentially, you want to apply force asymmetrically in your favor, but in order to do so, you must command the battlefield and dictate the terms of engagement.
Delete